Friday, December 28, 2012

Presenting: Sesame Chicken

Sesame Chicken


This dish is very similar to the chicken teriyaki dish I published last May because it's not very challenging from a preparation standpoint, but the challenge is presentation and photography. This is a dish I profiled on my first website but these are two qualities I believe need the most improvement.

The Challenge

Improve my photography and presentation skills.

The Source

I initially prepared this recipe in April of 2010 and took the recipe from Danielle of Let's Dish. To get the recipe, please click her link. I altered Danielle's dish slightly by adding the sesame seeds and scallion garnish after plating.

Successful?

You decide. The picture I took follows:


Tuesday, December 25, 2012

Christmas 2012: Homemade Coffee Liqueur

Homemade Coffee Liqueur


A couple of years ago, I found an English toffee bark recipe that I gave as Christmas gifts. It was an educational experience on a number of levels. First, the recipients really appreciated homemade gifts. Second, stretching the budget for Christmas gifts is unnecessary. Third, fighting crowds at the local shopping mall is unnecessary too especially in this day and age when you can have items delivered to your doorstep.

This year, I gave a coffee liqueur. One of the most popular is Kahlua. I was inspired to make this food when Liz of That Skinny Chick Can Bake made hers and thought it was a creative idea.

The Challenge

Making food at home from scratch.

The Source

I didn't use Liz's recipe because Kahlua describes their liqueur as rum-based and she used brandy and vodka. After some research, I found that vodka was a common ingredient in homemade versions because it adds no flavor, but I was able to find one that used solely rum by a bartender on yumsugar.

Ingredients

1 750-milliliter bottle white rum
1 1/4-cup dark rum
1 1/2 cups sugar
12 ounces whole coffee beans
1 vanilla bean
1 cinnamon stick
1 orange peel

Method

1. Combine all of the ingredients in a sealable container. Shake hard to combine. Record the date on the container and store in a cool, dark place for three weeks. Shake or stir the mixture several times of week.


2. Strain through cheesecloth or a fine mesh strainer into a clean vessel. Use like you would Kahlua or any other coffee liquor.


Successful?

Yes. The aromatic scent of the liqueur once I opened the container was very fragrant. I had the time, so I stored the mixture for four weeks instead of three. The picture above where the solids were strained was taken on Sunday, December 23rd.

I hope you all enjoyed your holiday and spent it with family and friends.

Monday, December 17, 2012

Riso alla Pitocca: Traditional Rice and Chicken

Riso alla Pitocca: Traditional Rice and Chicken


Did I mention how much I love braises in cold weather? This would be the fourth braised dish I've published this month (the third with chicken) so I'm declaring December the month of braising here at Crazy Foodie Stunts. This one caught my eye when I was preparing the polenta for the chicken cacciatore dish because it was on the opposite page from the polenta recipe. It uses Arborio rice in a way that I've never seen before (namely, risotto or arancini).

The Challenge

Using an alternate method to prepare an ingredient

The Source

Adapted from page 90 of Lidia's Favorite Recipes by Lidia Matticchio Bastianich and Tanya Bastianich Manuali.

Ingredients

1 1/2 pounds boneless, skinless chicken breasts, cut into 1-inch chunks
1 cup onion, coarsley chopped
1 cup carrot, coarsley chopped
1 cup celery, coarsley chopped
2 large cloves garlic, peeled
1/2 cup extra-virgin olive oil
1 tablespoon kosher salt
1 bay leaf
1 cup dry white wine
5 cups turkey stock, hot
2 cups Arborio rice
2 tablespoons butter
3 tablespoons, fresh Italian parsley, chopped
1/2 cup freshly grated Parmigiano, plus more for garnish

Method

1. Combine the onion, carrots, celery and garlic in a food processor and pulse to mince into a mirepoix.

2. Heat the olive oil in a saucepan over medium-high heat. Add the mirepoix and 1 teaspoon salt. Cook, stirring frequently, until the mirepoix has adsorbed the liquid, about 5 minutes. Add the chicken with the bay leaf and season with the remaining salt. Stir occasionally until the chicken has browned and caramelized on all sides, about 4 minutes.


3. Raise the heat and deglaze with the white wine, scraping any fond on the bottom of the pan, cooking until the wine has almost evaporated. Stir in the hot stock and add the rice. Bring to a boil, then cover and reduce heat to so the rice is bubbling gently. Cook until the rice and the chicken have cooked through and the consistency is creamy, about 14 minutes. Remove from heat and add the butter. Stir vigourously until melted. Stir in the parsley and 1/2 cup grated Parmigiano. Serve immediately in warmed pasta bowls.


Successful?

Despite a some flaws in execution (I'd use less mirepoix), I was very satisfied with this dish. It reminded me of risotto but a far easier preparation method.

Thursday, December 13, 2012

Pollo alla Cacciatore con Polenta

Pollo alla Cacciatore con Polenta


Since I published the dessert course of a dinner party I hosted earlier this week, I thought I'd also profile the entreé course. I also wanted to do so to show my appreciation to Kaitlin of I Can Cook That because I used recipes from the cookbook I won in her giveaway. I've prepared Michael Chiarello's chicken cacciatore recipe and his polenta recipe in the past, but have since learned Chef Chiarello uses some non-traditional ingredients and wanted to update it.

I also love that Chef Bastianich uses yellow corn meal in her polenta. I've used the stuff that is labeled 'polenta' at the grocery store but struggled to find a significant difference. At almost twice the price it was difficult to justify. Her method is also slightly altered from others I've seen.

The Challenge

Update a dish I profiled earlier with more authentic ingredients.

The Source

Adapted from pages 152 to 153 and 91 to 92 of Lidia's Favorite Recipes by Lidia Matticchio Bastianich and Tanya Bastianich Manuali.

Ingredients

8 skin-on bone-in chicken thighs
kosher salt and freshly ground black pepper
all-purpose flour
1/4 cup vegetable oil
1/4 cup plus 1 tablespoon extra-virgin olive oil, divided
1 small yellow onion, chopped
1/2 cup dry white wine
1 28-ounce can crushed tomatoes
1 tablespoon fresh oregano, minced
8 ounces fresh white mushrooms, sliced
1 red bell pepper, cored, seeded and cut into 1/2-inch strips
1 yellow bell pepper, cored, seeded and cut into 1/2-inch strips
8 cups water, divided
2 bay leaves
1 tablespoon kosher salt, or as needed
1 1/2 cups yellow corn meal
1 tablespoon fresh Italian parsley, chopped fine (for garnish)

Method

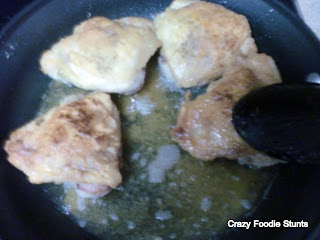
1. Season the chicken with kosher salt and freshly ground black pepper. Dredge the chicken in the flour coating them lightly. Heat th vegetable oil in a wide pan with 2 tablespoons of the olive oil and add the chicken to brown. Cook in batches if all of the chicken doesn't fit into the pan at once. Once browned, remove from pan onto a plate.


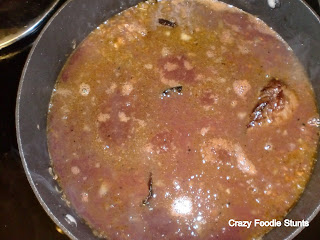
2. Add the onion to the fat in the pan, stirring for 5 minutes. Deglaze the pan with the white wine and bring to a boil, cooking until reduced by half, about 3 minutes. Add the tomatoes and oregano, lightly seasoning the fluid with salt and pepper. Add the chicken back to the pan, reducing to a simmer, cover and cook for 20 minutes.


3. While the chicken simmers, heat the remaining 2 tablespoons in a skillet over medium-high heat. Add the mushrooms and peppers, tossing until the peppers are wilted but still crisp, seasoning with salt, about 8 minutes.


4. Add the vegetables to the chicken, cover and cook until the vegetables are tender, about 10 to 15 minutes, adding water to barely cover the chicken along the way if necessary.

5. While the vegetables sauté, bring 4 cups of water to a simmer in a small saucepan. Cover and keep warm over medium-low heat. Combine the remaining water, bay leaves and 1 tablespoon salt to a boil in a 3- to 4-quart saucepan over medium-high heat. When boiling, add the olive oil.

6. Slowly add the corn meal to the larger saucepan a little at a time, stirring continuously with a wooden spoon or spatula. This should take approximately 5 minutes. Once all the corn meal has been added, the mixture should be thick, with large bubbles popping on the surface. Reduce heat to medium-low and continue stirring until it becomes so thick that your spoon cannot move easily, about 4 minutes.

7. Add 1 cup of the reserved water to restore the mixture to a smoother consistency and continue stirring until thick. Repeat this process (adding water to loosen and then stirring until thick) until the corn meal is tender, about 20 minutes. Continue stirring weithout the water additions until the corn meal is shiny and it is thick enough to stand a spoon in it. To serve, spoon some polenta on a plate, adding the braising fluid, then topping with the chicken. Garnish with parsley.

Successful?

I kept the polenta a little looser than the recipe suggests so I could present it differently. Most other recipes I've seen combined 1 part polenta with 4 parts liquid, then stirring continuously until thick, so Chef Bastianich alters this process slightly.

Ultimately, the extra effort was worth it as I enjoyed the flavors, but more importantly, my guests did too.

Monday, December 10, 2012

White Chocolate Peppermint Cheesecake

White Chocolate Peppermint Cheesecake


There's an old saying in the culinary world that goes something like this: If cooking is an art, then baking is a science. It's one of the reasons I don't prepare many desserts for presentation here. It's also one of the reasons I have so much respect for baking blogs such as Joanna of Chic & Gorgeous Treats, Amy of Fragrant Vanilla Cake and Jennie of The Messy Baker, just to name a few.

In fact, my original plan for the guest post I did for Kim Bee of Cravings of a Lunatic was a apple cheesecake, taking my idea of using breakfast cereal to make a crust from Apple Jacks. My result was tasty, but it wasn't very pretty and I didn't want an ugly dish to present as a first impression to new readers.

This isn't my first time at the rodeo, so to speak. I've prepared a number of cheesecakes in the past, but have never prepared one where I've been completely satisfied. I've either had problems with cracks that appear on top or the center not setting properly. A majority of cheesecake recipes found online are topped somehow, either with a ganache, or some other type of garnish I suspect to hide any flaws in appearance. (It's a dirty secret with cheesecakes.)

Fortunately, there's help. One of the most comprehensive explanations I found on why many home bakers fail at cheesecakes and suggestions on how to avoid these pitfalls is by Diana of Diana's Desserts. I have used the water bath technique to avoid cracks in the surface but I still have issues with a soft center.

Mrs. Stuntman and I hosted some friends for dinner last night where I served this seasonal dessert so I thought I'd share it here.

The Challenge

Successfully complete a baked dessert.

The Source

I adapted the recipe from Natalie of Once Upon a Cutting Board I found via feastie.com. Natalie's original source is Kraft Foods Inc. Like Natalie, I opted for an Oreo cookie crust but omitted the added sugar in the crust because the cookie crumbs are already sweet.

Ingredients

1 cup Oreo cookie crumbs
3/4 cup white granulated sugar
4 tablespoons unsalted butter, melted
Cooking spray
3 8-ounce packages cream cheese, softened
3 large eggs
4 ounces white chocolate, melted
1/4 teaspoon peppermint extract
2 cups frozen whip cream topping, thawed
1/2 cup crushed peppermint candy (candy canes), divided
8 cups water, boiling

Method

1. Prepare the baking pan: Grease a 9-inch springform pan with cooking spray and line the bottom and the side with parchment paper. Wrap the springform pan in aluminum foil so that it completely covers the bottom of the pan and halfway up the sides.


2. Make the crust: Preheat the oven to 325° Fahrenheit. Combine the Oreo cookie crumbs and the melted butter and press into the springform pan. Bake for 10 minutes.


3. Make the cake batter: Beat cream cheese and white sugar with an electric mixer until well blended. Add 1 egg and beat on low speed just until blended. Repeat twice more with each egg. Stir in the white chocolate, 1/4 cup peppermint candy and peppermint extract, being careful not to over stir. Pour the batter into the springform pan on top of the Oreo cookie crust.


4. Bake the cheesecake: Place a roasting pan large enough to accommodate the springform pan in the oven and put the prepared springform pan in the larger roasting pan and pour boiling water into the roasting pan until it reaches 2 inches up the side of the springform pan. Bake the cheesecake for 45-50 minutes, or until the center is almost set. Turn off the heat and leave the cheesecake in the oven for an additional hour. Remove the springform pan from the roasting pan and cool to room temperature on a wire rack. Then refrigerate at least 6 hours to overnight.


5. Garnish the cake: Immediately before serving, top the cheesecake with the whip cream and shower with the remaining peppermint candy.

Successful?

I didn't have any surface cracks with this cheesecake, however I was a little nervous after the 50 minutes in the oven because the batter was a little wobbly. Ultimately it stiffened up as it cooled.

At the very least, I might bake more often simply for the reason that it was a great opportunity to spend some quality time with my daughter. Also, my guests were very happy with the dessert.


Lastly, if you aren't familiar with Natalie, you can get to know her by giving her a 'Like' on facebook, following her on twitter and/or Pinterest.

Friday, December 7, 2012

Long-Cooked Hen in Tomato Sauce

Long-Cooked Hen in Tomato Sauce


This is about as spontaneous as I will get when it's regarding this publication. I hadn't planned on this dish until the day I prepared it. I had been looking at this recipe since the day I found it in one of my cookbooks and earlier this week curiosity got the best of me. Also, I already had all the ingredients required except for the chicken and tomatoes.

Braising is one of my favorite cooking techniques, especially in cold weather. In fact, I also have another braised dish planned for next week. Braised chicken is pretty common (I've prepared four braised chicken dishes within the last nine months alone.) but braising a whole chicken without breaking it down?

The Challenge

Successfully applying a standard cooking method to an unusual protein.

The Source

Taken from page 168 of Michael Chiarello's Casual Cooking by Michael Chiarello with Janet Fletcher, but I also found it on Chef Chiarello's website, NapaStyle.

Ingredients

1/3 cup extra-virgin olive oil
2 cups onion, chopped
1 cup celery, diced
1 cup carrots, diced
2 tablespoons garlic, minced
2 bay leaves
Kosher salt
2 cups red wine
6 28-ounce cans whole tomatoes, partially pureéd through a meat grinder, or a food mill, or pilsed in a blender (I used 28-ounce cans of crushed tomatoes)
Freshly ground black pepper
1 4-pound whole fryer chicken
1/2 cup fresh basil, minced
1/4 cup fresh Italian (flat-leaf) parsley

Method

1. Preheat oven to 325° Fahrenheit. Heat the olive oil in a large stock pot over high heat. Add the onion, carrot, celery, garlic, bay leaves and 1 teaspoon salt. Cook, stirring occasionally for approximately 3 minutes. Reduce heat to medium and cook until the vegetables are lightly browned, about twenty minutes.


2. Deglaze with the wine and scrape the pot, loosening the fond. Add salt and pepper to taste, however add enough salt to season the chicken as it cooks.


3. Add the chicken, breast-side down, in the sauce and bring to a simmer. Transfer the pot to the oven and cook, uncovered until the chicken is very tender, about two hours, occasionally spooning the sauce over the chicken. Stir in the basil and parsley and cook for an additional fifteen minutes. Serve the chicken topped with sauce family style or the sauce with pasta as a first course and the chicken as a second course. Freeze any leftover sauce.


Successful?

A couple of notes: The stock pot I used to cook this chicken is the same one I used to brine whole chickens I buy. It's only 8 quarts, so when I prepare my brine I use only 1 gallon (or 4 quarts) of water because when I submerge the chicken in it, the displacement brings the fluid level to almost the top of the stock pot. I note this because I noticed that I was approaching the 4-quart line of my prep bowl as I was emptying my fourth can of tomatoes, so I only used 4 cans.

I also advise adding the chicken after bringing the tomatoes to a simmer (stirring occasionally) because I burned my mirepoix waiting for the tomatoes to heat.

Ultimately, the dish is a little bit of a departure for me because it was rustic and served family style but successful. Mrs. Stuntman enjoyed it and in the end, that's all that matters.

Monday, December 3, 2012

Tra Vigne's Braised Beef Short Ribs

Tre Vigne's Braised Beef Short Ribs


Hello there! Have you forgotten about me? I'm still here but I took the month of November off. I wanted to get better acclimated with my kitchen and I didn't want to add to the noise of conflicting advice on how to prepare a successful Thanksgiving feast.

During my time off I won a giveaway hosted by Kaitlin of I Can Cook That. You might remember I noted her earlier this summer when I won another giveaway she hosted that was sponsored by Buitoni. This time I won Lidia's Favorite Recipes by Lidia Matticchio Bastianich and Tanya Bastianich Manuali. To thank Kaitlin, I'll prepare at least one dish from Chef Bastianich's book which will appear here soon.

Tre Vigne Restaurant is in the Napa Valley region of California which originally opened by Michael Chiarello. Tre Vigna's current menu features a short rib dish but specifies the ribs are smoked, then braised which is different from this recipe.

The Challenge

I looked at dozens of braised beef short rib recipes and all followed a basic operating procedure of searing the ribs, removing the ribs, adding and browning a mirepoix, deglazing and adding the braising fluid along with the ribs, bringing to a simmer and reducing the heat to low to break down the connective tissue that makes the short ribs so tough except one. This recipe separated itself by putting the beef in a brine overnight before cooking which is unusual for beef.

This isn't so much of a challenge as it is a question: Will the brine make a difference in flavor and moisture in a beef dish?

The Source

I took this recipe from epicurious.

Ingredients

1 quart water
1 cup light brown sugar, packed
1 cup Kosher salt
1 bay leaf
5 juniper berries (I didn't have any available.)
4 pounds meaty beef short ribs
1 tablespoon vegetable oil or more if needed
2 medium onions, chopped
1 large carrot, chopped
1 head of garlic, unpeeled and cut in half crosswise
2 cups of beef broth or stock
1 cup of dry red wine
1 cup Sherry vinegar (I used red wine vinegar.)
1 cup canned crushed tomatoes tomato pureé

Method

1. Brine the ribs. Combine water, sugar, salt, and bay leaf in a pot and simmering over medium heat until the sugar and salt are dissolved. Cool the mixture to room temperature. Add the short ribs to the brine and chill covered in the refrigerator for at least four and up to twenty-four hours. Remove short ribs from the brine and pat dry with paper towels. Then discard the brine.


2. Preheat the oven to 325° Fahrehneit. Heat vegetable oil in a heavy ovenproof Dutch oven over medium high heat on top of stove uncovered. Sauté the ribs in batches until browned on all sides, about three minutes per side. Remove ribs to a platter.


3. Add the onions, carrot and garlic head to the pot and cook over medium heat stirring occasionally until vegetables are golden, about eight minutes. Stir in stock, wine, vinegar and tomato pureé, scrapping up any brown bits on the bottom of the pan. Add the ribs back and any juices on the platter to the pot and bring to a simmer.


4. Cover and transfer to the preheated oven. Braise in the oven until meat is tender about two-and-a-half to three hours. Remove ribs from sauce and discard garlic skin, which should have separated from the cloves of garlic. Serve the ribs with the sauce on the side.

Successful?

The recipe author notes that this dish is even better if cooked on Day 2 (if Day 1 is used for preparing the brine), refrigerated overnight in the sauce, reheated and eaten on Day 3 removing any solidified fat before the reheating process.

In all honesty, I'm unsure if the brine made a difference because the vinegar was so overpowering. The ribs were tender and I could hardly keep the meat from falling off the bone. The one endearing quality is Mrs. Stuntman enjoyed it.