Monday, May 28, 2012

One-Pot Chicken and Rice Redux


Readers of my old website might remember seeing this recipe about a year ago. It begs the obvious question why publish it again, dummy? Well, when I first prepared this dish, I remember the rice was flavorful, but the chicken was bland. After preparing this dish a few more times, I eventually fixed it by using a brine.

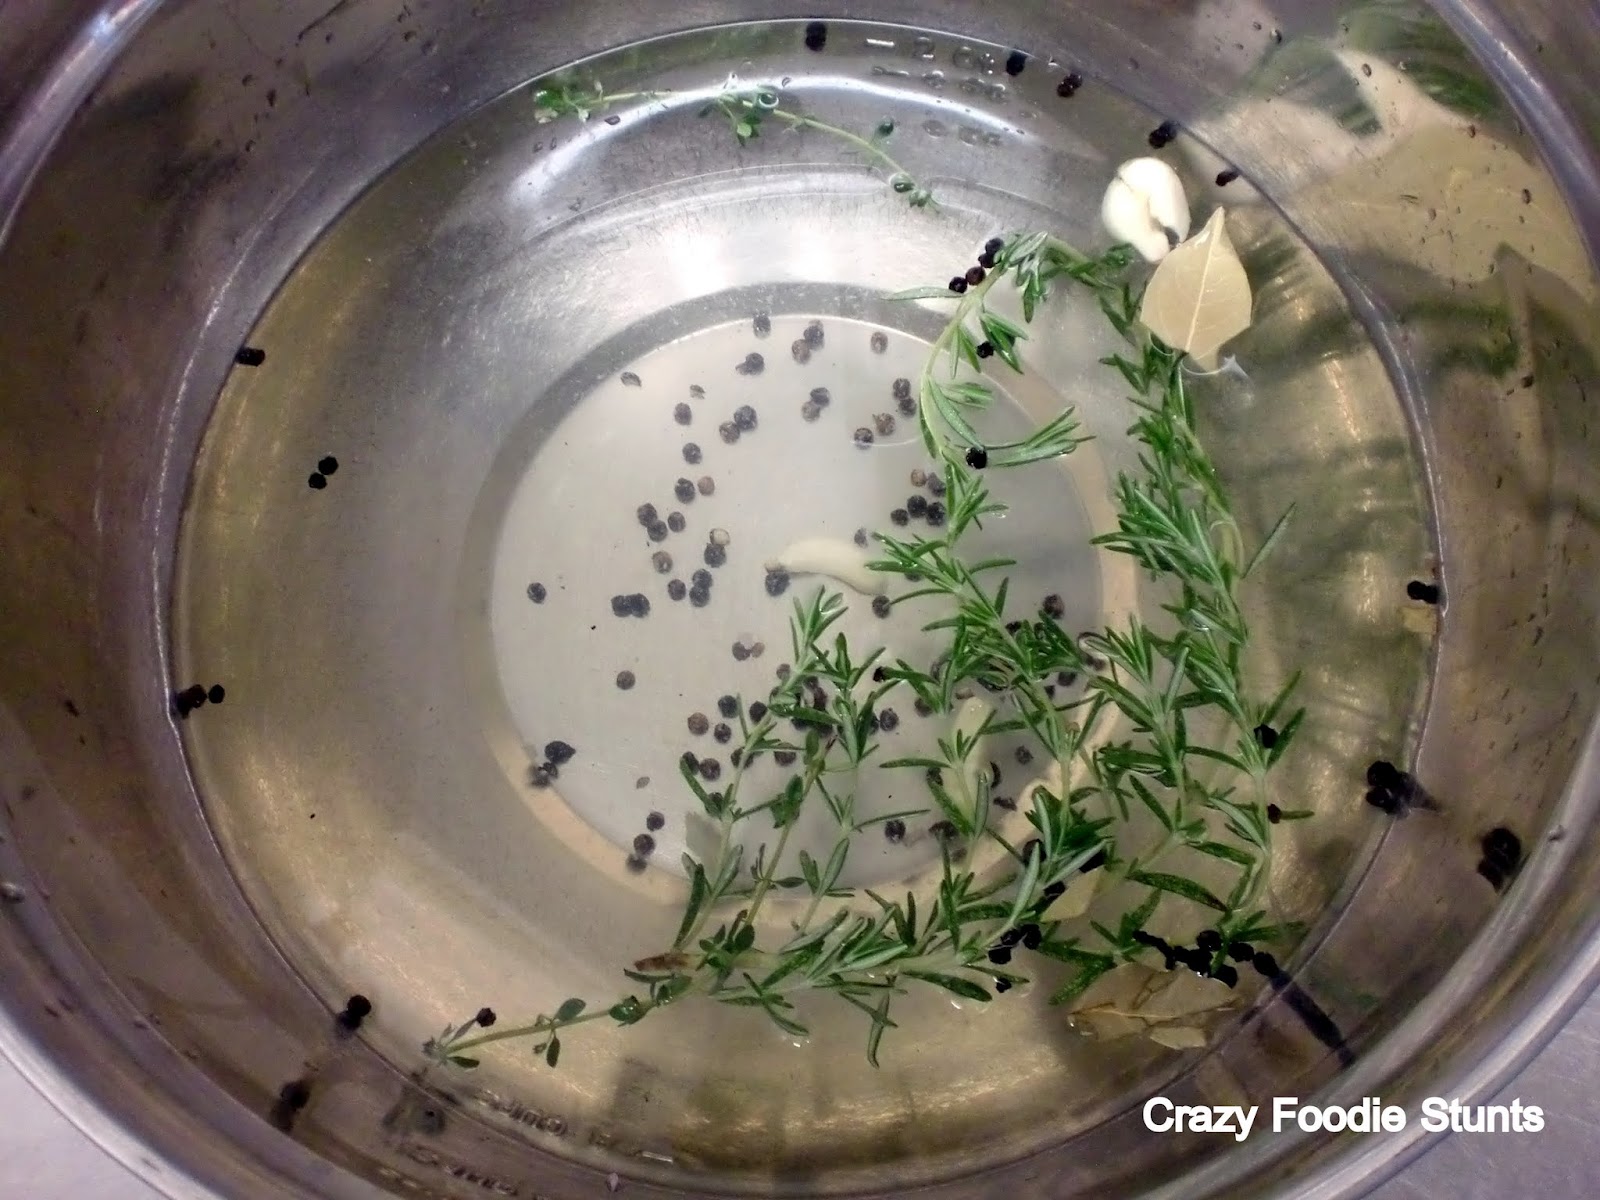
What exactly is a brine? A brine is basically a salt water solution along with other seasonings to add moisture and flavor, resulting in juicier food. Marinades are similar to brines but work to tenderize and add flavor to proteins using an acidic ingredient such as vinegars or citrus juices.

The Challenge

Fix an inferior concept while elevating a dish and demonstrating a technique to improve flavor.

The Source

The brine is original but the dish has been adapted from page 345 of America's Test Kitchen Family Cookbook Third Edition.

Ingredients

2 quarts water
1/2 cup kosher salt
1/2 cup white sugar
1/2 teaspoon black peppercorns, cracked
1 bay leaf
Juice from 1/2 lemon
2 cloves garlic, crushed
1 sprig rosemary
1 sprig thyme

4 bone-in, skin on split chicken breasts 5 bone-in, skin on chicken thighs
kosher salt and freshly ground black pepper
1 tablespoon vegetable oil
1 onion, chopped medium
1/4 teaspoon red pepper flakes
4 cloves garlic, minced
1 1/2 cups long grain white rice
3 1/2 cups low sodium chicken broth
1/2 cup dry white wine
1 10-ounce package frozen broccoli spears, thawed and chopped medium
4 ounces cheddar cheese, shredded (approximately 1 cup)
lemon wedges (for serving)
*Items italicized can be changed depending on availability, and preference.

Method

1. Whisk 1/2 cup kosher salt and 1/2 cup white sugar into 2 quarts water until dissolved. Stir in the (other seasonings) and submerge the chicken completely in the brine and refrigerate for 2 to 4 hours in a resealable bag, turning halfway through.


2. Remove the chicken from the brine and discard the brine. Pat the chicken dry with paper towels and season with kosher salt and freshly ground black pepper. Heat oil in a large Dutch oven over medium high heat until just smoking. Add the chicken, skin side down and cook until golden, about 5 minutes. Transfer the chicken to a plate, leaving the fat in the pot.


3. Add the onion, red pepper flakes, and 1/2 teaspoon kosher salt to the fat in the pot and place over medium heat. Cook, scraping up any fond (browned bits) until the onion is softened, about 5 minutes.


4. Stir in the garlic and cook until fragrant, about 15 seconds. Stir in the rice and cook until the edges turn translucent, about 3 minutes. Stir in the broth and the wine and bring to a simmer.


5. Return the chicken to the pot, skin side up. Cover, reduce heat to low and cook until the chicken is fully cooked through and registers 175 Fahrenheit on an instant read thermometer, about 25 minutes.


6. Transfer the chicken to a serving platter. Pat the broccoli dry, then stir into the rice. Stir in the cheddar and let it melt for 1 minute. Season the rice mixture with salt and pepper to taste. Serve with lemon wedges.

Successful?

Yes, both the rice and the chicken were flavorful.

Friday, May 18, 2012

Chicken Teriyaki and a Soapbox

Chicken Teriyaki


I'd like to thank Bobbi of Bobbi's Kozy Kitchen for bringing this to my attention. Wednesday, after I published the Marinara recipe, I was online and saw that she was bewildered by an article she read on the International Association of Culinary Professionals website entitled Opinion: Faking It by Amy Reiley. I don't want to summarize her sentiments so if you want any of what I am about to write to make sense, please read her blog post now.

Here, I'll wait....Done? Okay.

I found myself in unfamiliar territory because I enjoy sharing my food and it has always been a positive experience for me, but this article angered me. Even though I felt Ms. Reiley took a shot at me and my community of passionate food bloggers, I wanted to take the high road and tried to make my reaction constructive. The moderator stopped publishing new comments but I know they received it because I subscribed to the comments feed and got replies.

I wrote to the author:

I am the author of a small food blog but not professionally trained in culinary arts. I am that novice "stay-at-home father" that you write about so passionately.

Ms. Reiley, I think what might help your argument is to define the difference between "professionals" and "hobbyists" because if the corporations such as Folgers Coffee or Sara Lee pays a food blogger (with no formal culinary training) to develop recipes using their products, are they still amateurs? If I am Dannon Yogurt, I'm not going to hire any idiot that set up a free website last Saturday afternoon on a whim. I do agree that it’s utterly foolish not to test the recipes these home cooks produce, but each business must find what works best for them.

Conversely, I've seen numerous challengers compete on Iron Chef America that have had no formal culinary training and went to "the school of hard knocks". Should we still call them professionals?

The other issue you fail to discuss is the prospective each food blogger contributes. I clearly state on my website that I am not a professional, yet I attempt dishes with difficult preparation, uncommon cooking methods, or items that are taken for granted (and can easily be bought at any local supermarket) in an endeavor to learn something with my audience. If anything, I'm trying to prove the point that the crap pushed at consumers by corporations is prepared better at home and any schmuck can replicate it. Most bloggers share similar points of view and see it more as an educational experience. Are we "dumbing down" the culinary profession or are we making our audiences smarter by learning from our experiences?

I’m not proficient enough to develop my own recipes yet, so if anything, I’m paying professional publishers to test their recipes for them by buying their cookbooks or watching their television shows. If I ever get to that point, I wouldn’t publish anything I wouldn’t be proud of or publish my mistakes with notes to my audience how to avoid my failures.

Ultimately, and with all decisions at the corporate level in this day and age, it comes down to a business decision. Each professional chef has developed their own styles and preferences of preparing food so professional publications must appeal to the home cook because it’s a much wider audience. Recipes contained in Gourmet Magazine might sound daunting (in the name itself) to a mom who’s worked a full eight hour day and must feed 2 screaming kids and a hungry husband dinner. I’m not a fan of Rachel Ray’s food, but I can see the appeal because she’s relatable. Am I correct to assume that your concern lies solely with those corporations that outsource recipe development to people with no formal training and then fail to test the recipe production? Then please direct your concern towards food journalists and food manufacturers and leave us passionate home cooks and food bloggers alone.


It was only after I wrote this that I realized I forgot to point out that food bloggers with no professional training who are hired by food manufacturers to develop recipes represent a small percentage of the food blogging community.

I'm also reminded of an experience I had about a year ago when I hosted a dinner party for some friends. I prepared a pasta dish I got online from a celebrity chef who instructed the cook to blanch broccoli rabe then put said rabe in a skillet with hot oil. You can imagine what occurred: The rabe splattered all over the place and created a scene. It occurred to me after reading this article that this recipe wasn't adequately tested because I ran into the recipe again recently and he updated it so this won't occur.

I believe Ms. Reiley has some legitimate complaints, but her anger should be directed to the people who hire food bloggers so cheaply. Kimmy of Lighter and Local also published her thoughts regarding the matter and her remarks reflect the general consensus among the food bloggers I spoke to. I don't speak for everybody, so tell me: Do you agree? Let me know by leaving me a comment.

May 20th, 2012 Update: IACP has done some back tracking and published comments (including mine) from the original post. You can read the update here.

Now, off the soapbox and back to the fun: The food!

Since you gave me permission (by reading my sentiments above) to rant, I thought I'd leave you with this recipe, however it was never intended to be published here for several reasons:

1. There isn't much originality to it
2. The preparation method is too simple for what I am trying to achieve with this website.
3. It's not authentic Japanese.
4. I didn't take pictures while preparing it.

I used this picture as my profile picture on facebook for a few days because I am trying to improve my photography and plating skills. Again, this is more of a Mildly Disturbed Foodie Stunt with the only redeeming quality being the sauce wasn't store-bought.

The Source

Adapted from page 330 of America's Test Kitchen Family Cookbook Third Edition.

Ingredients

8 bone-in skin-on chicken thighs
Freshly ground black pepper
2 teaspoons vegetable oil
1/2 cup soy sauce
1/2 cup sugar
2 tablespoons mirin, sweet sherry or dry white wine
2 teaspoons ginger, grated
1 garlic clove, minced
1/2 teaspoon corn starch
1/8 teaspoon red pepper flakes

Method

1. Pat the chicken dry with paper towels, then season with black pepper. Heat the oil in a 12-inch non-stick skillet over medium-high heat until just smoking. Add the chicken skin-side down. Weigh down the chicken with a heavy pot. Cook until the skin is a deep mahogany brown and very crisp, 15 to 20 minutes. (Check the chicken after 10 minutes. The skin should be moderately brown but if it's very brown, reduce the heat but if it's still pale, raise the heat.)

2. Remove the weight and turn the chicken. Reduce the heat to medium and continue to cook without the weight until the second side is brown and the chicken is thoroughly cooked, about 10 minutes.

3. Meanwhile, whisk together the soy sauce, sugar, mirin, ginger, garlic, corn starch, and red pepper flakes.

4. Transfer the chicken to a plate. Pour off all of the fat from the skillet. Re-whisk the soy mixture to recombine, then add to the skillet and return to medium heat. Return the chicken to the skillet, skin-side up and spoon the sauce over the top. Continue to simmer until the sauce is thick and glossy, about 2 minutes.

I'll have more Crazy Foodie Stunts in the future...

Wednesday, May 16, 2012

Michael Chiarello's Ragù alla Marinara

Michael Chiarello's Ragù alla Marinara


Before I discuss the recipe, I'd like to discuss a few items:

1) Thank you for the incredible response to my fajitas recipe. For a website still in it's infancy (like this one), traffic numbers are important and this one has already received twice the number of hits in May than it received in previous months and we are only about halfway through. Many visitors were impressed with the homemade tortillas I made to accompany my fajitas however, I consider the gnocchi recipe I published in March far more ambitious. Check it out!

2) A special thanks to April of Ape's Eats, who announced me as the winner of her taco set giveaway. The items I won will appear on this website in the near future.

3) Who's watching the eighth season of The Next Food Network Star? My early favorite is Eric on Team Bobby because he's local to me (only an hour away by car), his point of view is similar to my own and it's pretty gutsy to resign from his position to become a contestant.

Now, onto the food...

In all honesty, this isn't the most exciting dish I've prepared (call it a Disturbed Foodie Stunt) but the budget's been especially tight recently. My family is always looking for ways to save money and we've been relying a lot on pasta dishes because they're cheap. Jarred pasta sauces will get the job done, but there is no control over the ingredients or the preservatives that are added to lengthen its shelf life at the supermarket. The other issue I have with these jarred sauces is that they are very expensive compared to purchasing the ingredients separately and making it at home. It's almost insulting!

One note regarding tomatoes used in pasta sauces. The best to use, when they're in season, are San Marzano tomatoes. However if they're not in season or not available, the best to use is the canned variety. I find this a little ironic because whenever I watch food competition shows, fine dining chefs always cringe at the thought of using canned food, yet this is an exception.

The Challenge

Save money without sacrificing flavor.

The Source

This recipe was taken from page 33 of Michael Chiarello's Casual Cooking by Michael Chiarello with Janet Fletcher.

Ingredients

2 tablespoons extra-virgin olive oil
1/2 cup onion, minced
1 tablespoon fresh Italian parsley, chopped
1 large clove garlic, minced
4 cups tomato pureé
1 large fresh basil stem with leaves removed (I used 1 tablespoon fresh oregano leaves, chopped)
1 teaspoon kosher salt
Baking soda or sugar, if needed

Method

1. Heat the olive oil in a large nonreactive pot over moderate heat. Add the onion and sauté until translucent, about 8 minutes.


Add the parsley and garlic and cook briefly to release their fragrance.


Add the tomato pureé, basil and salt.


Simmer briskly until reduced to a saucelike consistency, stirring occasionally so nothing sticks to the bottom of the pot. The timing will depend on the ripeness and meatiness of your tomatoes and the size of your pot. If the sauce thickens too much before the flavor develops, add a little water and continue cooking.

2. Taste and adjust the seasoning. If the sauce tastes too acidic, add a pinch of baking soda and cook 5 minutes more. If it needs a touch of sweetness add sugar and cook 5 more minutes. Remove the basil stem before tossing with pasta and serve.

Successful?

Yes, the sauce had more flavor than the store bought varieties. It needed neither sugar or baking soda. I waited until the pasta was cooked to add any water so I could use the pasta water to thin out the sauce.

I plan to revisit a more complex version of Marinara in the future. Will the extra work make the sauce better? Stay tuned...

Friday, May 4, 2012

Steak Fajitas

Steak Fajitas


This recipe is my contribution to Food Network's Mother's Day Communal Table. This isn't something that you would traditionally think of when preparing Mother's Day dishes, but...(and guys, here's a hint so take note) I think you need to customize your dishes to suit the wants of the ladies in your life. For me, my mother, my sister (who's also a mother) and my wife all enjoy Mexican or Tex-Mex dishes, plus they all like to eat on the healthier side. This dish might also fit into any Cinco de Mayo celebrations, however this dish did not originate in Mexico.

Normally, this fajita recipe would be a little too simple for this website, so I have included a Crazy Foodie twist to it but feel free to replace my experiment making food from scratch with store-bought varieties.

The Challenge

Satisfy the wants of three Moms at the same time.

The Sources

This fajita recipe was taken from issue #68 of Saveur Magazine.

Ingredients

3 small yellow onions, peeled and halved lengthwise
3⁄4 cup plus 1 tablesoon vegetable oil
1 tablespoon worcestershire sauce
1⁄4 teaspoon liquid smoke
1 bay leaf
1 1⁄2 teaspoon freshly ground black pepper
Salt
1 2-pound skirt steak, cut into 3" pieces
1 green bell pepper, stemmed, cored, and thickly sliced
1 red bell pepper, stemmed, cored, and thickly sliced
12 scallions, trimmed
1 tomato, cored and quartered
6" homemade or store-bought Flour Tortillas

Method

1. Finely chop 1 of the onion halves and put into a large deep glass or ceramic dish. Add 3⁄4 cup of the oil, worcestershire sauce, liquid smoke, bay leaf, black pepper, and salt to taste and mix well. Add meat to dish and turn in marinade until well coated. Cover dish with plastic wrap and marinate meat in the refrigerator for at least 8 hours and up to 12 hours.


2. After steak has marinated, heat a charcoal grill until coals are hot. Remove meat from dish, discarding marinade. Grill meat over hot coals, turning once, 4–6 minutes for medium rare. (You may also cook meat in a grill pan on the stove over high heat.) Transfer meat to a cutting board and set aside.


3. Thickly slice the remaining 2 onions lengthwise and set aside. Heat the remaining 1 tbsp. oil in a large skillet over medium-high heat until hot but not smoking. Add onions and bell peppers, season to taste with salt, and cook, stirring often, until vegetables are lightly charred but still crunchy, 3–4 minutes.


4. Meanwhile, thinly slice meat against the grain, add to skillet with vegetables, and stir until heated through, 1–2 minutes. Divide fajitas equally among four heated cast-iron fajitas platters or large heated plates; garnish with scallions and tomato wedges. Serve with warm tortillas, if you like.

As I stated above, feel free to skip this part with store bought tortillas, but quick and easy is not my style. For my own twist on this dish, I decided to make homemade flour tortillas using a Rick Bayless recipe.

Ingredients

3/4 pound (2 3/4 cups) all-purpose flour, plus a little extra for rolling the tortillas
5 tablespoons lard or vegetable shortening, or a mixture of the two
3/4 teaspoon salt
about 3/4 cup very warm tap water

Method

1. Combine the flour and fat in a large mixing bowl, working in the fat with your fingers, until completely incorporated. Dissolve the salt in the water, pour about 2/3 cup of it over the dry ingredients and immediately work it in with a fork; the dough will be in large clumps rather than a homogeneous mass. If all the dry ingredients haven't been dampened, add the rest of the liquid (plus a little more, if necessary). Scoop the dough onto your work surface and knead until smooth. It should be medium-stiff consistency -- definitely not firm, but not quite as soft as most bread dough either.

Dough After Wet Ingredients Were Added
Kneaded Dough

2. Divide the dough into 12 portions and roll each into a ball. Set them on a plate, cover with plastic wrap and let rest at least 30 minutes (to make the dough less springy, easier to roll).


3. Heat an ungreased griddle or heavy skillet over medium to medium-high heat. On a lightly floured surface, roll out a portion of the dough into an even 7-inch circle: Flatten a ball of dough, flour it, then roll forward and back across it; rotate a sixth of a turn and roll forward and back again; continue rotating and rolling until you reach a 7-inch circle, lightly flouring the tortilla and work surface from time to time.


Lay the tortilla on the hot griddle (you should hear a faint sizzle and see an almost immediate bubbling across the surface). After 30 to 45 seconds, when there are browned splotches underneath, flip it over. Bake 30 to 45 seconds more, until the other side is browned; don't overbake the tortilla or it will become crisp. Remove and wrap in a cloth napkin placed in a tortilla warmer. Roll and griddle-bake the remaining tortillas in the same manner and stacking them one on top of the other.


Successful?

Yes! In fact, my wife brought leftovers to her office the next day. She shared her lunch with her colleagues who, after tasting the dish, wanted to invite themselves over for dinner.

Be sure to come back on Wednesday, May 9th to view other participants at The Communal Table!

May 9th Update: Food Network has decided to cancel this Communal Table so, unfortunately, there are no other participants to share.

Happy Mother's Day!