Showing posts with label soy sauce. Show all posts

Sunday, May 24, 2015

Baby Back Ribs with Roasted Strawberry Barbecue Sauce for a Red, White and Blue #SundaySupper

Baby Back Ribs with Roasted Strawberry Barbecue Sauce for a Red, White and Blue #SundaySupper


Yikes! A quick check of my records finds that I didn't participate in a #SundaySupper event in April which is the first and only month I've missed since I began with the group in January 2013. I had planned to participate in the April 19th Picnic event hosted by T.R. of Gluten Free Crumbley and had prepared a dish but I ran into a few execution issues, so I wasn't able to fulfill my commitment but I'm happy to be back today.

Inspiration Behind the Dish

With this week's #SundaySupper theme, Red, White and Blue, I was considering my options when I noticed some strawberries in my refrigerator Mrs. Stuntman had purchased from Costco. A quick check of The Flavor Bible yielded pairings that suggested a dessert, however I'm not normally a dessert type of guy. I then remembered that pork pairs well with sweet flavors and was intrigued by the thought of strawberries paired with pork. It also occurred to me that I won't be able to compete in Ribfest in the Park this year, but had I been able to attend, I would use this recipe.

Dish Details

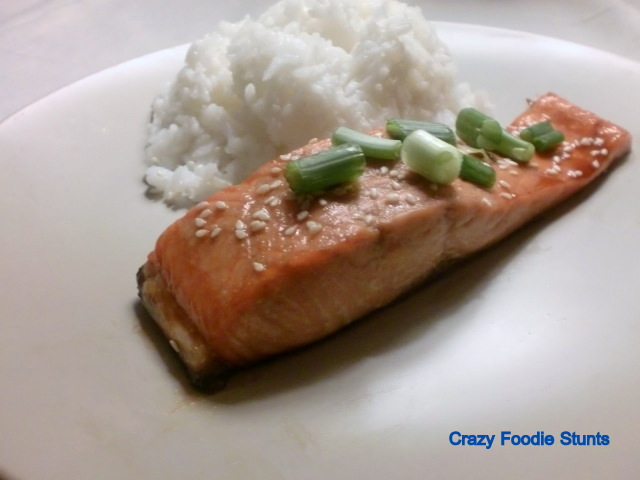
From a preparation standpoint, this dish will look a lot like the one I published last July, but with a different sauce. For it, I used a barbecue sauce I found on epicurious as a guide, but it's ultimately a Crazy Foodie Stunts original. Other than the short cut I take in smoking the ribs, I would imagine that this dish could be found on any southern barbecue restaurant.

Ingredients

1 pound fresh strawberries, hulled and cut in half lengthwise
Kosher salt
Freshly ground black pepper
1 tablespoon olive oil
1 clove garlic, minced
1 teaspoon onion powder
1 teaspoon cumin
2 teaspoons chili powder
1 cup ketchup
1 tablespoon balsamic vinegar
2 tablespoons soy sauce
1/8 teaspoon liquid smoke
1 2-to-3 pound rack baby back ribs

Special equipment: smoker bag

Method

1. Roast the strawberries and make the sauce. Preheat the oven to 350º Fahrenheit. Toss the strawberries with salt and pepper, then place on an aluminum foil-lined sheet pan in a single layer. Roast the strawberries in the oven until they soften and start to caramelize, approximately 20 minutes.


In a medium saucepan, heat the olive oil over medium heat, then add the garlic, onion powder, cumin and chili powder to sweat, approximately 1 to 2 minutes. Add in the ketchup, balsamic vinegar, soy sauce and liquid smoke and simmer for 10 to 15 minutes in order to blend the flavors. Adjust the seasoning with salt and pepper if necessary, then remove from heat and let it cool before placing in the refrigerator. The sauce can be made a day ahead of your rib preparation.


2. Rib preparation. Pat the ribs dry with a paper towel, then season with salt and pepper. Place the ribs in the smoker bag bone-side down, then follow the instructions on the smoker bag. In my case, I placed smoker bag on an aluminum foil-lined sheet pan, then placed the oven rack on the lowest position possible and preheated the oven to 500º Fahrenheit. I placed the ribs in the oven at 500 for 15 minutes, then reduced the heat to 375º Fahrenheit for an additional 60 minutes. Remove the ribs from the oven and increase the heat to 425º Fahrenheit, then let the rind rest for 10 minutes before removing them from the smoker bag. Baste the ribs on both sides with the reserved strawberry barbecue sauce and place back in the oven so the sauce caramelizes, approximately 2 to 3 minutes. Let the ribs rest for an additional 5 minutes, then cut crosswise into individual portions and serve with any leftover sauce.


Final Thoughts

From an execution standpoint, there are a couple of items to discuss. In my own evaluation, I found that I reduce the sauce too much and found it overly thick, as I simmered it closer to 20 minutes so I recommended dialing it back to 10 minutes in my instructions above. Secondly, I recommend resting the ribs in the smoker bag after 75 minutes primarily because the bag needs to cool down to handle. The smoker bags I use are sealed shut by folding the open end over twice so I recommend unfolding the bag carefully before removing the ribs because there will be about 1 cup of rendered fat in the bag that needs to be discarded before basting the ribs. The ribs can easily be prepared in the smoker bag on the grill but I highly recommend using indirect heat to caramelize the sauce in step 2 because the sugars in the sauce will cause the ribs to burn easily.

Before I leave you with the other red, white and blue dishes, I just wanted to acknowledge my friend Bobbi of Bobbi's Kozy Kitchen who prepared a similar strawberry barbecue sauce last summer and encourage you to try her recipe too!

Food Using One Color
Red Food
White Food
Blue Food
Food Using Two Colors
Red and White Food
Blue and White Food
Red, White and Blue Food

5 Tips for Potlucks by Sunday Supper Movement

Sunday Supper MovementJoin the #SundaySupper conversation on twitter on Sunday! We tweet throughout the day and share recipes from all over the world. Our weekly chat starts at 7:00 pm ET. Follow the #SundaySupper hashtag and remember to include it in your tweets to join in the chat. To get more great Sunday Supper Recipes, visit our website or check out our Pinterest board.

Would you like to join the Sunday Supper Movement? It’s easy. You can sign up by clicking here: Sunday Supper Movement.

Monday, April 13, 2015

Light Stunt: Broccoli with Beef

Light Stunt: Broccoli with Beef


It came as a surprise to me recently that when I was in the produce section at the supermarket with my daughter when she pointed and exclaimed, Broccoli! I like that stuff! When I inquired, she told me that her school cafeteria serves it frequently so I promised to prepare more dishes with broccoli.

Over the last several months, I've gotten to know the staff at the local supermarket so I had them slice a couple of sirloin steaks so that they would be suitable for a stir fry and the prep for the garlic, ginger and broccoli took less than 20 minutes which makes for a great weeknight dish.

The Challenge

Measure my daughter's taste for broccoli.

The Source

The only place where I deviated from my source was in the garnish (I added sesame seeds) so I'll refer you to epicurious.com for the recipe.

Successful?

As I'm finishing my dinner, I look over to my daughter's plate to see most of the beef gone, but only half of the broccoli eaten. She eventually finished the beef but left about one-third of the broccoli which is more than I expected, however I'm now on a new quest to find a broccoli dish that she will completely eat. You can bet I'll be consulting The Flavor Bible.

Sunday, December 21, 2014

Skillet Steak Fajitas for an Easy Holiday Entertaining #SundaySupper with @Beef

Skillet Steak Fajitas for an Easy Holiday Entertaining #SundaySupper with @Beef


There seems to be a certain theme in my dishes recently. Namely, a mad scramble to find an alternate dish because I wasn't able to prepare my original idea. Such was the case last Sunday and it repeats its ugly head again today. The dish I wanted to prepare originally utilized the oven which is not available to me at the time of this writing. I do live in an apartment and the matter is being addressed by the maintenance staff but it requires an order for a replacement part and am at the mercy of the manufacturer and the shipping company, so I am too.

This dish isn't the first one thought of when discussing Holiday dishes, but I must ask, why not? The dish could easily be prepared on a weeknight and if presented buffet-style would be perfect for a potluck style Holiday celebration. In fact, beef can be much more versatile during this time of year than a roast (but that always works well too!) To learn more about the adaptabililty of beef, I encourage you to review the Beef Checkoff website, 'Like' their facebook page, in addition to following them on their twitter and pinterest pages, but especially the #SundaySupper Beef pinterest board for more recipe ideas. This post is sponsored by The Beef Checkoff. All opinions are my own.


From the standpoint of the dish itself, long time readers of my site will remember that I profiled this dish two and a half years ago however I've done some additional research since then and have learned to fortify flavor of the dish.

The Challenge

Replicate a more flavorful version of a dish I profiled previously.

The Source

This dish has been inspired by Serious Eats and The Pioneer Woman

Ingredients

1/2 cup plus 1 tablespoon vegetable oil
1/4 cup lime juice
1/4 cup soy sauce
2 tablespoons brown sugar
3 cloves garlic, minced
1/2 tablespoon ground cumin
1/2 tablespoon freshly ground black pepper
1/2 tablespoon chili powder
1 flank steak, approximately 2 pounds
3 bell peppers, each a different color (red, green, orange, or yellow), coarsely julienned
1 large yellow onion, peeled, cut in half lengthwise (from root to stem), then sliced thin crosswise
8 to 10 flour tortillas, warmed
Salsa, guacamole, sour cream and/or shredded cheeses, for serving

Method

1. Marinate the fajitas. Combine the first eight ingredients in a small bowl, then divide the marinade between two resealable plastic bags. Place the flank steak in one of the bags and the bell peppers with the onions into the second. Push any excess air out of the bags, seal and refrigerate for 3 hours.

2. Cook the fajitas. In a large skillet, heat one tablespoon oil over medium high heat. While the pan is heating, remove the flank steak and the vegetables from their marinades and shake off any excess. Add the flank steak to the pan first, about 3 minutes per side or until medium rare. Remove from heat and set aside. Add the vegetables into the same skillet and cook, stirring occasionally, until softened, approximately 5 minutes.


3. To serve, slice the flank steak thinly across the grain and serve with warmed tortillas and your chosen condiments, such as salsa, guacamole, sour cream and/or cheeses.

Successful?

One of the things I liked about Ree's version in addition to Chef López-Alt's is the seasoning of the accompanying onions and peppers which don't receive as much attention as the beef in many recipes and a good example is the version I published previously.

Please check out other Beef dishes for this week's event:

Appetizers
Brunch or Breakfast for a Crowd
Main Dish
Potluck Style
Sunday Supper MovementJoin the #SundaySupper conversation on twitter on Sunday! We tweet throughout the day and share recipes from all over the world. Our weekly chat starts at 7:00 pm ET. Follow the #SundaySupper hashtag and remember to include it in your tweets to join in the chat. To get more great Sunday Supper Recipes, visit our website or check out our Pinterest board.

Sunday, November 16, 2014

Miso Risotto for a #SundaySupper On The Hunt

Miso Risotto for a #SundaySupper On The Hunt


One difference between where I lived in California and where I live in Washington is the number of ethnic grocery stores. They're more common in the San Francisco Bay Area. I can understand that demand drives their numbers so I had to look to find a supermarket that stocks imported Asian ingredients when I needed them for this dish. How does this fit in with this week's #SundaySupper theme of On The Hunt? Well, the ingredients used may either be sourced through traditional hunting methods, foraged (mushrooms, for example), or hunted down online or at far away ethnic supermarkets. For me, I chose option C because I imagine I'd be just as bad shot as Dick Cheney and didn't know where to begin foraging for other items. I went to a local chain called Uwajimaya for my miso paste and mirin.

Let's discuss the dish. Definitely a fusion concept applying Japanese ingredient substitutions to the Italian risotto method, but would it taste good? I've profiled the risotto method here several times in the past so there's nothing new from an execution standpoint however I was intrigued.

The Challenge

Successfully combine a Japanese flavor profile into an Italian dish.

The Source

I adapted the dish from Foodista

Ingredients

5 to 6 cups water
3 tablespoons white miso paste
2 tablespoons peanut oil
1 shallot, chopped
1 tablespoon fresh ginger, minced (approximately 1-inch piece ginger root, peeled)
1 cup Arborio rice
Green leaves from 2 baby bok choy, julienned
1/2 cup mirin
1 tablespoon soy sauce
Freshly ground black pepper
2 tablespoons slivered almonds
2 green onions, sliced thin

Method

1. Combine the water and miso in a saucepan over medium heat and bring to a light simmer. Stir to dissolve the miso, then reduce the heat to keep warm.


2. Pour the oil in a skillet and place over medium heat. Once hot, sweat the ginger and shallots in the oil then add the rice to toast. Add the bok choy leaves and stir until wilted. Deglaze the skillet with the mirin, stirring until it evaporates. Add in the miso water, 1/2 cup to 1 cup at a time (eyeball it), stirring continually until each addition has been absorbed before adding another. Keep adding miso water and stir until the rice is al dente. (Start tasting the rice after three or four additions.)


3. Once the rice is cooked, stir in the soy and black pepper. Adjust the seasoning, if necessary, with more salt. Serve in warmed bowls garnished with green onions and almonds.

Successful?

Before I proceed, let me first thank Stacy of Food Lust People Love and Tara of Noshing with the Nolands for hosting this week's event!

I made a few ingredient substitutions of my own. I substituted soy sauce for tamari, which is similar to soy, but milder and gluten-free. I also increased the amount of water because I know that three-and-a-half cups of water is insufficient to fully cook 1 cup of Arborio rice. I also found baby bok choy were a little more forgiving when julienned and did not need to remove the white stems.

From an execution standpoint, I found that, as the water evaporated during the process of stirring, the miso remained and became difficult to stir which prevented the grains of rice from cooking as evenly as I would have liked. I would recommend it only for those who are experienced with preparing more traditional risotto flavors. I recommend this more traditional preparation of risotto if you want to prepare risotto and have never done so. Ultimately Mrs. Stuntman only ate about half and quipped "Next time, just prepare my favorite. You know, the one with bacon and peas." I must admit, the dish was reminiscent of a poorly prepared fried rice.

For the record, Uwajimaya is about 8 miles away from my front door, but it's about a twenty minute drive without taking freeways, whereas the closest Asian supermarket from my previous residence was about half in distance and travel time. So despite my troubles with it, I am thankful for this dish because it presented the opportunity to explore my neighborhood and become more familiar with it.

Before you go, please review the other more successful #SundaySupper dishes that also feature ingredients that have been obtained on the hunt:

Spread it on Thick
Nibbles and Sides
The Main Event
Sweet Treats
Sunday Supper MovementJoin the #SundaySupper conversation on Twitter on Sunday! We tweet throughout the day and share recipes from all over the world. Our weekly chat starts at 7 p.m. ET.  Follow the #SundaySupper hashtag and remember to include it in your tweets to join in the chat. To get more great Sunday Supper Recipes, visit our website or check out our Pinterest board.

Would you like to join the Sunday Supper Movement? It’s easy. You can sign up by clicking here: Sunday Supper Movement.

Thursday, July 3, 2014

Presenting: Giada's Asian Chicken Salad

Giada's Asian Chicken Salad


Earlier this week, the weather was warm locally so I told Mrs. Stuntman that I didn't want to heat up the kitchen and settled upon a chicken salad instead. A quick search yielded a salad recipe from Giada I found on Food Network's website. I substituted chopped walnuts for slivered almonds and omitted the chow mein noodles because I forgot to purchase some when I went shopping for ingredients. It made a perfect dinner on a hot day.

Unlike the last time I promised this, I will be back Sunday with a dessert. Until then, I hope those reading this in the United States have a delightful Independence Day filled with great food, family and/or friends, and fireworks.

Friday, June 6, 2014

Light Stunt: Chicken Stir Fry with Spinach and Peanuts

Chicken Stir Fry with Spinach and Peanuts


Call this my first cookbook review.

A while back a college friend had given Mrs. Stuntman and I a copy of Fifty Shades of Chicken by FL Fowler. As you can imagine, I was a little skeptical. The book does contain fifty chicken preparations divided into three sections: the first using whole bird, the second using chicken parts and the third more complicated dishes. Preceding each recipe is some really corny dialog about how a chicken feels about being prepared. I'd rate it a PG-13.

So the other night, I was thumbing through the book looking for last minute dinner ideas and found this dish that looked appealing.

The Challenge

Determine whether this book is more style than substance.

The Source

Adapted from page 88

Ingredients

1 pound boneless skinless chicken thighs, cut into bite-size pieces
Kosher salt
Freshly ground black pepper
1/3 cup chicken stock
1 1/2 tablespoons soy sauce
1 teaspoon corn starch
1 teaspoon honey
1 1/2 tablespoons peanut oil
1 1/2 teaspoons toasted sesame oil
1 bunch scallions, chopped fine (separate whites from greens)
2 cloves garlic, minced
1 tablespoon fresh ginger, minced
1/8 teaspoon red pepper flakes
4 cups baby spinach
1/2 cup roasted peanuts
Cooked white rice, for serving

Method

1. Finish the mise en place: Season the chicken with salt and pepper. Whisk together the chicken stock, soy sauce, corn starch and honey, then set aside.


2. Sear the chicken: Put the peanut oil and sesame oil in a large non-stick skillet and place over medium-high heat. Once the oil starts to smoke, add the chicken and fry, stirring frequently until almost cooked through, approximately five to seven minutes. Remove the chicken to a plate and set aside once the chicken has browned.


3. Flavor the stir fry: Once the chicken has been removed, add the garlic, ginger, red pepper flakes and scallion whites. Stir until fragrant which should take a minute or two. Add the spinach and stir until wilted, an additional minute. Deglaze the skillet with the chicken stock mixture and bring to a rapid simmer, scraping up any fond from the bottom of the skillet. Once the fluids thicken, add the chicken, peanuts and scallion greens and cook until the chicken is cooked through, approximately one to two minutes. Toss to combine then serve over rice.


Successful?

If you can look past the cheesy elements of this book, it's a good book for beginning cooks. Mrs. Stuntman also enjoyed the dish which came together rather quickly; perfect for a weeknight meal.

Thursday, May 15, 2014

Presenting: Asian Chicken and Cabbage Salad


Asian Chicken and Cabbage Salad


This post was fairly spontaneous. The weather this week has been very warm where I live. The predicted high temperature in San Francisco the day I typed this was 94 which is highly unusual. To give you an idea, a thirty minute drive east during the hottest days of July when it can often reach over 100, it's common for San Francisco not to break 80. This past Monday, after listening to the weather forecast I made a list to purchase ingredients for warm weather dishes such as ceviche and gazpacho. I also looked at salads and found one on Bon Appétit magazine's website that sounded refreshing.

It's subjective, but I'm also slowly coming to the realization that I take my best pictures outdoors. The picture of the gazpacho I referred to above wasn't taken by me, but my strawberry dessert I published last September and the Moscato themed dessert from a couple of weeks ago were, so I thought I could use the practice.

You might also contrast this salad to the salad I published for the Five Ingredients or Less #SundaySupper event because there are more than five ingredients in the dressing. I didn't adapt the recipe, so you can get it here.

Thursday, May 8, 2014

Light Stunt: Salmon Teriyaki

Salmon Teriyaki


One dish that is in my weeknight dinner rotation is the chicken teriyaki dish I published two years ago. I'll prepare it about once or twice per month. Recently, Mrs. Stuntman requested salmon for dinner one evening so I found a recipe for it in my new Chef Carla Hall cookbook when it occurred to me to compare the two teriyaki sauces.

The Challenge

A recipe contest: Is America's Test Kitchen's teriyaki or Chef Hall's teriyaki better?

The Source

Adapted from page 92 of Carla's Comfort Foods: Favorite Dishes from Around the World by Carla Hall with Genevieve Ko.

Ingredients

1/4 cup packed brown sugar (light or dark is fine)
1/4 cup water
2 tablespoons soy sauce
1/2 teaspoon rice vinegar
1 1-inch piece of fresh ginger, peeled and sliced into thin disks
1 garlic clove, smashed with the side of a knife
4 6-ounce center-cut salmon fillets
2 green onions, sliced thin (for garnish)
1/2 teaspoon sesame seeds (for garnish)

Method

1. Place broiler rack 6 inches from the heat source and preheat the broiler to high. In a small saucepan, combine the first six ingredients and bring to a boil, stirring the mixture so the sugar dissolves. Reduce the heat and simmer until the mixture thickens, approximately ten minutes. Once complete, remove the ginger and garlic with a slotted spoon and discard.


2. Place the salmon fillets on a foil-lined sheet pan and broil until the fillets are opaque on the surface, approximately five minutes. Remove from the broiler and glaze the sauce onto the fillets and return to the broiler until opaque on top, but still translucent in the center, approximately three minutes. Remove from the broiler and let it rest to allow for any carryover cooking. Transfer the salmon to serving plates and garnish with the green onions and sesame seeds. Serve with steamed white rice.


Successful?

In a word, yes. It's subjective, but Mrs. Stuntman liked Chef Hall's better.

Saturday, April 19, 2014

Garlic Fried Rice for National Garlic Day

Garlic Fried Rice


Among the many perks I have being married to Mrs. Stuntman, one is my mother-in-law who is of Chinese descent. One evening she demonstrated my favorite Chinese dish, fried rice. There were a couple of things that stuck with me from it. First, it is imperative that the mise en place is completed before starting this dish because it cooks quickly. In fact, if you're preparing a protein to accompany this side dish, start this dish while you allow the protein to finish carryover cooking. Second, use little oil, or else the dish becomes a greasy mess.

The Challenge

Successfully execute an authentic Chinese staple.

The Source

This is a Crazy Foodie Stunts original recipe, adapted from my mother-in-law.

Ingredients

1 teaspoon vegetable oil
1 large egg, beaten
2 tablespoons garlic, minced
3 cups cooked white long-grain rice, cooled
1/2 cup frozen peas and carrots, thawed
3 tablespoons soy sauce
Kosher salt
Freshly ground black pepper
Flat leaf parsley sprigs, for garnish

Method

1. In a large wok or non-stick skillet, heat the vegetable oil over medium heat. Add the egg and cook until it solidifies, breaking it up into bite sizes pieces as it cooks, approximately 1 to 2 minutes. Once completed, remove from the pan and set aside. Add the garlic to the hot oil and cook until it starts to brown, then add the rice and stir to incorporate the garlic with the rice, breaking up any clumps of rice along the way with your spoon. Add the frozen peas and carrots and stir until heated through, then add the eggs back in and the soy sauce. Stir to incorporate. Taste and adjust the seasoning with salt and pepper, if necessary, then serve on a warmed plate garnished with parsley sprigs family style.

Successful?

I normally take pictures while I am preparing my food but in this case, I didn't have any time to do so because, as I stated above, the dish cooks quickly. This dish is also a great way to clean out the refrigerator because almost anything can be added to it. Got leftover chicken? Dice it up and throw it in with the peas and carrots.

Oh, I almost forgot to note, this dish was prepared to celebrate National Garlic Day and this post is part of a group of bloggers organized by Heather of girlichef. Please check out the other garlic dishes below. In addition, there's a giveaway of some pretty cool items and the details are below.


Giveaway
In honor of National Garlic Day and our love of the stinking rose, we are giving away a Garlic Lovers Prize Pack (valued at over $100) that includes:
  1. The Garlic Farmers' Cookbook
  2. One-year membership to the Garlic Seed Foundation
  3. 5 Garlic Button Covers
  4. OXO Good Grips Garlic Press 
  5. The Ultimate Garlic Peeler
  6. Tumbleweed Pottery Garlic Clove Canister Keeper with Vented Lid
  7. Terra Cotta Garlic Roaster
  8. 2 Bulbs of Whole Black Garlic
To enter, simply leave a comment on this post (mandatory) answering this question: What is your favorite GARLICKY dish (or one that you'd love to try)?

After you've answered the question for entry into this contest, be sure to record that you did so in the rafflecopter widget below; doing so will unlock many more optional ways to earn entries.

a Rafflecopter giveaway

This giveaway is open to residents of the Continental USA. Entries will be accepted through 11:59 pm ET on Thursday, April 24, 2014. All entries will be verified. A winner will be chosen from qualifying entries via random draw, and notified via email within 48 hours of the close of this contest. The winner will have 24 hours from the time the email is sent to respond with their complete name and mailing address (no P.O. Boxes). If no response is received within 24 hours, a new winner will be chosen.

Prizes provided by The Garlic Seed Foundation, Food Lust People Love and girlichef. Prizes may vary slightly from images shown and are subject to replacement with comparable items if ones pictured are no longer available at the close of this contest. Items may be shipped separately.


Thursday, February 13, 2014

Tea Smoked Roast Chicken

Tea Smoked Roast Chicken


Cross this one off the To Do List.

I found this recipe several years ago but never got around to preparing it. It appealed to me because of the unusual cooking technique. Then it occurred to me that I already had many of the ingredients used to prepare the dish leftover from my chicken wings post, so the timing was good.

The Challenge

Unusual cooking method: Smoking a chicken using tea leaves.

The Source

This is a Chef Andrea Reusing found on Food & Wine magazine's website but I adapted some of the ingredients.

Ingredients

2 quarts water
6 cloves garlic, smashed
9 dried red chiles, divided
10 star anise pods, divided
3 tablespoons honey
Two-inches fresh ginger, peeled and thinly sliced
Zest of 1 small orange
1 1-inch piece of cinnamon stick
1 cup soy sauce
1 small yellow onion, quartered
1/4 cup plus 3 tablespoons sugar, divided
1 whole chicken, approximately 5 to 6 pounds
1/2 cup long grain white rice
1/4 cup plus 2 tablespoons loose jasmin tea
Vegetable oil, as needed
1 teaspoon Szechuan peppercorns, crushed
Kosher salt
Fried rice, for serving

Method

1. Brine the chicken. In a large stockpot, combine the water, garlic, 5 of the red chiles, 4 star anise pods, honey, ginger, orange zest, cinnamon, onion and 1 tablespoon sugar. Simmer the brine over medium heat for 10 minutes, then remove from heat and let it cool. Once the brine has reached room temperature, add the chicken to the stockpot. Rotate the chicken so that the brine has coated all of the skin, then rest it so it is breast side down.

Cover and refrigerate overnight.

2. Smoke the chicken. Preheat the oven to 375° Fahrenheit, then line a stovetop-safe roasting pan with a double layer of aluminum foil. Remove the chicken from the brine and discard the brine. Pat the chicken inside and out with paper towels, then truss the chicken. Break the remaining red chiles and star anise into pieces, then combine them with the rice, remaining sugar, and tea. Pour the tea mixture into the roasting pan so that it coats the bottom evenly.


Place a rack on top of the tea mixture, then the chicken in the rack, breast side up. Cover the roasting pan with aluminum foil, sealing all sides, plus any overlapping pieces of foil with tape. Place the roasting pan over high heat for 2 minutes, then reduce heat to medium-low for 5 minutes. Remove from heat entirely and let it stand for 3 minutes. Remove the aluminum foil cover and let it rest for an additional 10 minutes.


3. Roast the chicken. Remove the rack with the chicken from the roasting pan, then the aluminum foil from the bottom along with the tea mixture. Return the rack back to the roasting pan, then rub oil over the chicken. Season them with the Szechuan peppercorns and kosher salt. Roast the chicken in the upper third of the oven for 35 minutes, then increase the heat to 425° Fahrenheit and roast for an additional 35 minutes, or until an instant read thermometer reads 165° Fahrenheit. Remove from oven, but let the chicken rest for approximately 10 minutes. Carve and serve with fried rice.

Successful?

The flavor of the tea was subtle, but still very good. I'd also recommend monitoring the chicken periodically while it roasts at 425° Fahrenheit. If it browns excessively, cover it with aluminum foil and continue roasting.

Sunday, January 26, 2014

Beer Braised Szechuan Chicken Wings for a Game Day Entertaining #SundaySupper with Gallo Family Vineyards

Beer Braised Szechuan Chicken Wings


I alluded to my love for football about a year ago with a quick pasta dish. I will further specify that I grew up a fan of the San Francisco 49ers, so I laughed when I read the theme for this week's #SundaySupper event with Gallo Family Vineyards, Game Day Entertaining and Pairings, because fans of my team used to have a reputation of being soft (i.e. the wine and cheese crowd) which contrasted with the fans of the other team across the San Francisco Bay. (On a side note, I was relieved when San Francisco lost to Seattle because I don't think Kaepernick would have been able to keep up with Manning, but that's an entirely different discussion.)

If you're unfamiliar with Gallo Family Vineyards, they have a store locator where you can find their wines, and can be found on facebook, twitter, Instagram, and YouTube. They also have a fun crest creator which you can customize. I did one myself you can see below. In the interest of full disclosure, compensation was provided by Gallo Family Vineyards via Sunday Supper, LLC. The opinions expressed herein are those of the author, and are not indicative of the opinions or positions of Gallo Family Vineyards.


GFV also sponsored a previous #SundaySupper event last month. During the twitter chat that week, a portion of the discussion centered around Moscato, which I had never tried. I was intrigued so when I was selected to participate in this week's event, I selected their white Moscato to use for my dish, however I hadn't realized it was a sweet wine when I did. I prefer dry wines such as chardonnays and cabernets because I usually pair them with savory dishes if I'm enjoying a glass with dinner or cook with them. I'm not really a dessert guy and can't appreciate sweet cocktails so I did a google search for wine pairings and one suggestion for Moscato was Chinese food. Many spicy dishes in their cuisine pair well with the sweet wine.

The Challenge

Pair a sweet wine with a spicy appetizer.

The Source

I adapted a chicken wings dish on Cooking Channel's website I thought would make for great game day entertaining.

Ingredients

2 pounds chicken wings, wing tips removed, then cut at the joint
1/2 cup soy sauce
1/4 cup dark brown sugar
2 tablespoons minced garlic
1 tablespoon minced fresh ginger
1 teaspoon Chinese five-spice powder
1 teaspoon Szechuan peppercorns, dry toasted until fragrant
5 dried red chiles, crushed
1 bunch scallion greens, cut in 2-inch pieces
1 star anise
1/4 cup rice vinegar
2 12-fluid ounce bottles ale beer
4 tablespoons unsalted butter
1 cup corn starch
1 cup all-purpose flour
Vegetable oil, for frying
1 teaspoon chives, chopped fine (for garnish)

Method

1. Marinate the wings: Combine the wings, soy sauce, sugar, garlic, ginger, five-spice, Szechuan peppercorns, dried chiles, scallion greens and star anise in a resealable bag and toss until the chicken is coated in the marinade. Refrigerate overnight.

2. Braise the wings: Empty the contents of the resealable bag into a large Dutch oven. Add to it the ale and rice vinegar. Bring the oven to a boil on the stovetop then reduce the heat and simmer, uncovered, until the wings are tender and the meat is almost falling off the bone, approximately 1 hour. Remove the wings onto a platter in a single layer and refrigerate until cold, reserving the braising fluid.


3. Fry the wings: Place enough vegetable oil in a large pot to reach a depth of at least 1 1/2 inches and heat to 375° Fahrenheit. Combine the corn starch and flour, then dredge each wing into the mixture and shake off any excess. Deep-fry the chicken, in batches if necessary, in the oil until deep brown and crisp, approximately 3 minutes, taking care to not overcrowd the pot. Remove the wings with a slotted spoon to a large bowl.


4. Finish the dish: While the wings are frying, place the braising fluid over medium heat and reduce until it is thick enough to coat the back of a spoon. Strain out and discard the solids, then return the braising fluid to the heat and whisk in the butter. Pour the fluid into the bowl with the chicken and toss until well coated. Serve immediately garnished with the chives and accompanied by Moscato.


Successful?

I need to confess that I didn't have time to marinate the wings overnight so the spicy flavors were muted, which suits me well since I dislike strong spicy dishes. The spice was just enough to complement the sweet flavor of Gallo Family Vineyards Moscato. Mrs. Stuntman also enjoyed this dish so much that these wings might make an encore appearance on Super Bowl Sunday.

Other Sunday Supper Participants

And finally, please check out this week's other Sunday Supper contributors:

Sunday Supper Movement


Join the #SundaySupper conversation on twitter on Sunday! We tweet throughout the day and share recipes from all over the world. Our weekly chat starts at 7:00 pm ET.  Follow the #SundaySupper hashtag and remember to include it in your tweets to join in the chat. Check out our #SundaySupper Pinterest board for more fabulous recipes and food photos.

Would you like to join the Sunday Supper Movement? It’s easy. You can sign up by clicking here: Sunday Supper Movement.