Showing posts with label oregano. Show all posts

Monday, May 11, 2015

Spaghetti with Sausage and Peppers plus Updates

Spaghetti with Sausage and Peppers


Hello? Are you still there? I haven't published a dish in almost a month but I have still been busy working. My anniversary was a couple of weeks ago but Mrs. Stuntman and I decided to forgo a dinner at a nice restaurant in exchange for the opportunity to upgrade our cell phones. While Mrs. Stuntman got a newer version of an iPhone, I made the leap from a $12 flip phone to a Samsung Galaxy S5. This is relevant here because, in addition to opening an instagram account for this website, the pictures of this dish were taken with it primarily because it has a 16-megapixel camera which is better than the 12-megapixel quality of my point-and-shoot camera I had been using.

I also attended a photography seminar which was held through my local parks and recreation department which was moderated by Duke Conrad who's an award-winning nature photographer. I encourage you to check out his portfolios at 500px.com and flickr.

The third update is that I have re-written my About Me page. In it, I summarize a new direction here from execution-focused challenges to flavor profile-focused challenges. As such, I will be announcing some format changes. I'll start with the inspiration behind the dish, then the dish details (which will include the recipe) and finish with some final thoughts. This dish will be my first under the new format.

Inspiration Behind the Dish

A contributing factor in why I went so long without publishing a here is because of Mrs. Stuntman's contributions to the dinner table as of late. She has been purchasing a lot of prepared food. Most of it is the type of food that is already fully-cooked and the only thing needed is to reheat and serve. Don't get me wrong, there isn't anything wrong with these items but it's just not appropriate to publish here at face value. So, while I was rummaging around the refrigerator on a recent evening, it occurred to me that the smoked mozzarella with artichoke and garlic chicken sausages could be used in a classic Italian pairing of sausage and peppers.

Dish Details

I adapted this epicurious recipe to accomodate a few ingredient substitutions in addition to the sausages noted above. First, I substituted spaghetti for the bucatini simply because I didn't want to pay the additional dollar for the bucatini. Bucatini is the same shape as spaghetti with the exception of a hole running through the pasta so it resembles a straw or a hose. Second, I puréed my tomatoes instead of crushing them by hand. I also substituted fresh oregano leaves for the dried and used regular parmesan instead of the Grana Padano. This dish would easily fit onto any casual Italian menu.

Ingredients

1 tablespoon extra-virgin olive oil
8 ounces smoked mozzarella with artichoke and garlic chicken sausages (approximately 3 links), casings removed
1 large onion, chopped
1 medium red bell pepper, julienned
1 medium yellow bell pepper, julienned
1 tablespoon garlic, minced
1/4 cup dry white wine
1 28-ounce can San Marzano tomatoes, puréed
1 tablespoon fresh oregano leaves, chopped
Kosher salt
Red pepper flakes
1 pound spaghetti
1/2 cup fresh Italian parsley leaves, chopped
1/2 cup freshly grated Parmesan

Method

1. In a large pot, bring to a boil at least 4 quarts of salted water to a boil over high heat. Separately in a large skillet, heat the olive oil over medium-high heat. Once the oil starts to smoke, add the sausage and break it up into bite size pieces until well browned, approximately 4 minutes. To the sausage, add the onion and peppers to sweat and adjusting the heat as needed, approximately 8 minutes.


2. Add in the garlic and stir until it becomes redolent, one or two minutes. Deglaze with the white wine, scraping up any brown bits and reducing for minute or two. Add in the tomato purée, 2 cups of the pasta water, then season with salt, red pepper and oregano. Simmer for approximately 20 minutes until the sauce reduces and becomes flavorful. Approximately 10 minutes in, drop the spaghetti into the boiling water and cook for two or three minutes less than the box instructions direct. Once the pasta is al dente, reserve 1 cup of the water, then drain and add to the sauce. Toss the pasta with the sauce and the parsley. Serve in warmed bowls garnished with Parmesan.


Final Thoughts

While not my most creative effort, it still was well balanced and perfect for a quick weeknight meal.

Saturday, June 15, 2013

Beer Can Chicken for a Father's Day #SundaySupper

Beer Can Chicken


Happy Father's Day!

This dish is one of my all-time favorites. I love beer can chickens for several reasons:

1) They are great fun for backyard barbecues in the summer. What's funnier than a chicken with a can of beer up it's backside?
2) When prepared properly, it tastes great and the meat is juicy.
3) The preparation is simple which frees you to focus on your side dishes.

For a while, it made it into my regular rotation of dinners (I prepared one once or twice per month), but I haven't prepared it as frequently in recent months because I don't have a grill. The principles are still the same. I brine the chicken beforehand to add flavor and moisture.

The Challenge

Adapt a traditionally grilled dish so it is prepared in the oven

The Source

The ingredients are a Foodie Stuntman original, but I was helped along with the method from food.com.

Ingredients

4 quarts cold water
1 cup sugar
1 cup plus 1 teaspoon kosher salt, divided
1 whole fryer chicken, (I used a 5-pound bird)
1 12-fluid ounce can cheap beer
1 teaspoon freshly ground black pepper
2 tablespoons extra virgin olive oil
1/4 teaspoon red pepper flakes
1 teaspoon each of fresh herbs

Method

1. Brine the chicken: Add 1 cup sugar and salt to water and stir until dissolved. Place the chicken in an 8 quart (or larger) container and pour the brine over the chicken. (You might need to put something on top of the chicken to keep it fully submerged.) Cover and refrigerate for 2 hours to overnight.


2. Season and cook the chicken: Remove one rack from the oven and place the other on the lowest level possible. Preheat the oven to 375° Fahrenheit. Remove the chicken from the brine and discard the brine. Pat the chicken dry with paper towels and rub the olive oil into the skin of the bird on all sides. Combine the salt, pepper and herbs into a bowl and rub underneath the skin of the breast, inside the cavity and on the skin on all sides.


Remove the top of the can of beer with a can opener and discard about one-third of the beer (or drink it). Add the red pepper flakes and a couple of leftover sprigs of herbs into the beer. Put the beer on a baking sheet and position the chicken over the beer so that the opening of the can is inserted into the cavity of the chicken so that the chicken stands upright. Tuck the wingtips behind the breasts similar to how you would truss the chicken. Place the chicken in the oven and cook until the internal temperature in the thickest part of the thigh (without touching the bone) reaches 175° Fahrenheit, approximately 75 minutes to 90 minutes. Remove the chicken from the oven and let it rest for 15 minutes to allow for carryover cooking. Carve and serve.

Successful?

I chose to keep the brine simple but you can flavor it with other ingredients if you wish. You might also wonder why I didn't specify which herbs I used to season the chicken. I had leftover herbs from the chimichurri sauce but it can vary with whatever is on hand at the time you prepare the chicken. Also, freeze the leftover carcass to make some chicken stock.

Other Sunday Supper Participants

And finally, please check out this week's other Sunday Supper contributors:

Dad’s Favorite Main Dishes:
Dad’s Favorite Appetizers and Sides:
Dad’s Favorite Desserts

Tuesday, June 11, 2013

Light Stunt: Grilled Flank Steak with Chimichurri Sauce

Grilled Flank Steak with Chimichurri Sauce


I prepared this dish out of curiosity, more than anything. I had seen it prepared by a number of Food Network personalities and even a local TV journalist put one on her personal blog. Chimichurri sauce originates from Argentina and traditionally pairs with grilled beef but can also be paired with chicken, fish or used as a marinade. From the recipe, I could determine that it's similar to a Genovese pesto with similar ingredients (raw herbs, garlic and oil) but I also noted that, because this sauce is served cool, it would be a refreshing contrast to grilled proteins.

The Source

The sauce was taken from page 26 of the recipe guide of Top Chef University DVD set.

Ingredients

1 flank steak, about 2 pounds
Kosher salt
Freshly ground black pepper
1/4 shallot, peeled and chopped roughly
1 small clove garlic, peeled
3 tablespoons red wine vinegar
Juice from 1 lemon
1 pinch lemon zest
1/4 teaspoon red pepper flakes
1/2 bunch fresh chives
1/4 bunch fresh flat leaf parsley
Leaves from 2 sprigs fresh thyme
3 sprigs fresh tarragon
1 tablespoon fresh oregano leaves
1 cup extra-virgin olive oil

Method

1. Remove flank steak from the refrigerator and let it come to room temperature, no more than 30 minutes. Pat the steak dry with paper towels and season it with salt and pepper. Heat a grill or grill pan over medium-high heat. Sear the steak over the grill about 6 minutes per side for medium rare, but check for doneness.
Once the proper temperature has been reached, remove and set aside for 5 minutes to allow for carryover cooking.

2. While the steak is resting, blend the shallot, garlic, lemon juice and lemon zest plus 1 tablespoon olive oil in a blender until the ingredients form a smooth paste. Add the herbs with the red pepper flakes and pulse until the herbs are chopped and the mixture forms a textured pureé. Add the oil and blend until the sauce is emulsified. All of the remaining oil may or may not be needed. To plate, slice the flank steak across the grain and serve topped with the sauce.

Successful?

I had a little difficulty categorizing this dish because I originally planned to just practice my presentation skills, but I also noted how quickly the dish came together which would make it perfect fir a weeknight meal.

In other news, did you see episode two of Next Food Network Star? I have a couple of questions: 1) Where was Bob and Susie this week? 2) How is Danushka still competing? The only explanation I can offer is that her burger was better than her competitors this week. I like the format of the challenge because it forced the contestants to effectively communicate their message but I was a little bored by the topic of burgers.

What are your thoughts? Reply in the comments.

Thursday, December 13, 2012

Pollo alla Cacciatore con Polenta

Pollo alla Cacciatore con Polenta


Since I published the dessert course of a dinner party I hosted earlier this week, I thought I'd also profile the entreé course. I also wanted to do so to show my appreciation to Kaitlin of I Can Cook That because I used recipes from the cookbook I won in her giveaway. I've prepared Michael Chiarello's chicken cacciatore recipe and his polenta recipe in the past, but have since learned Chef Chiarello uses some non-traditional ingredients and wanted to update it.

I also love that Chef Bastianich uses yellow corn meal in her polenta. I've used the stuff that is labeled 'polenta' at the grocery store but struggled to find a significant difference. At almost twice the price it was difficult to justify. Her method is also slightly altered from others I've seen.

The Challenge

Update a dish I profiled earlier with more authentic ingredients.

The Source

Adapted from pages 152 to 153 and 91 to 92 of Lidia's Favorite Recipes by Lidia Matticchio Bastianich and Tanya Bastianich Manuali.

Ingredients

8 skin-on bone-in chicken thighs
kosher salt and freshly ground black pepper
all-purpose flour
1/4 cup vegetable oil
1/4 cup plus 1 tablespoon extra-virgin olive oil, divided
1 small yellow onion, chopped
1/2 cup dry white wine
1 28-ounce can crushed tomatoes
1 tablespoon fresh oregano, minced
8 ounces fresh white mushrooms, sliced
1 red bell pepper, cored, seeded and cut into 1/2-inch strips
1 yellow bell pepper, cored, seeded and cut into 1/2-inch strips
8 cups water, divided
2 bay leaves
1 tablespoon kosher salt, or as needed
1 1/2 cups yellow corn meal
1 tablespoon fresh Italian parsley, chopped fine (for garnish)

Method

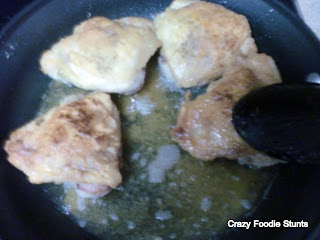
1. Season the chicken with kosher salt and freshly ground black pepper. Dredge the chicken in the flour coating them lightly. Heat th vegetable oil in a wide pan with 2 tablespoons of the olive oil and add the chicken to brown. Cook in batches if all of the chicken doesn't fit into the pan at once. Once browned, remove from pan onto a plate.


2. Add the onion to the fat in the pan, stirring for 5 minutes. Deglaze the pan with the white wine and bring to a boil, cooking until reduced by half, about 3 minutes. Add the tomatoes and oregano, lightly seasoning the fluid with salt and pepper. Add the chicken back to the pan, reducing to a simmer, cover and cook for 20 minutes.


3. While the chicken simmers, heat the remaining 2 tablespoons in a skillet over medium-high heat. Add the mushrooms and peppers, tossing until the peppers are wilted but still crisp, seasoning with salt, about 8 minutes.


4. Add the vegetables to the chicken, cover and cook until the vegetables are tender, about 10 to 15 minutes, adding water to barely cover the chicken along the way if necessary.

5. While the vegetables sauté, bring 4 cups of water to a simmer in a small saucepan. Cover and keep warm over medium-low heat. Combine the remaining water, bay leaves and 1 tablespoon salt to a boil in a 3- to 4-quart saucepan over medium-high heat. When boiling, add the olive oil.

6. Slowly add the corn meal to the larger saucepan a little at a time, stirring continuously with a wooden spoon or spatula. This should take approximately 5 minutes. Once all the corn meal has been added, the mixture should be thick, with large bubbles popping on the surface. Reduce heat to medium-low and continue stirring until it becomes so thick that your spoon cannot move easily, about 4 minutes.

7. Add 1 cup of the reserved water to restore the mixture to a smoother consistency and continue stirring until thick. Repeat this process (adding water to loosen and then stirring until thick) until the corn meal is tender, about 20 minutes. Continue stirring weithout the water additions until the corn meal is shiny and it is thick enough to stand a spoon in it. To serve, spoon some polenta on a plate, adding the braising fluid, then topping with the chicken. Garnish with parsley.

Successful?

I kept the polenta a little looser than the recipe suggests so I could present it differently. Most other recipes I've seen combined 1 part polenta with 4 parts liquid, then stirring continuously until thick, so Chef Bastianich alters this process slightly.

Ultimately, the extra effort was worth it as I enjoyed the flavors, but more importantly, my guests did too.

Monday, September 10, 2012

Guest Post at La Cucina Prima Donna: Chicken Marsala

Chicken Marsala


My second dish this month is another guest post. This time, I have prepared a dish for Carolina of La Cucina Prima Donna. Carolina is an Italian opera singer residing in New York and was even featured in a New York Daily News article. Carolina wrires about Italian dishes, restaurant reviews, and finding Italian ingredients and stories of her trips to Italy. Please 'Like' her facebook page.

When I volunteered to write a guest post for Carolina, her only requirement was to profile an Italian dish. I reviewed the dishes she'd prepared already and noticed she had not profiled a staple that has made it onto countless Italian casual dining chains here in the United States. Regular readers will be familiar with my disdain for these types of restaurants, so I couldn't pass up the opportunity to improve upon it at home.

If you want the recipe, then head over to La Cucina Prima Donna now. Then come back for an altered method.

Here, I'll wait....

So after I prepared this dish, I was discussing it with a friend of mine, Chef Robert Dasalla of Little Chef Counter, because I wanted to consolidate the preparation to just a single pan. First, I wanted to make clean-up easier but more importantly, I was concerned the flavors wouldn't blend with each other properly if the mushrooms were sautéed in a separate pan, not to mention the loss of any fond. He recommends rendering the pancetta after removing the seared chicken in the same pan, then sautéing the shallots and mushrooms with the pancetta after it has rendered. Deglaze with the marsala then add in the stock and bring to a simmer. Add back the chicken, cover and reduce heat to low for 30 minutes. Remove the chicken from the pan and then stir in some butter and mascarpone and simmer to thicken the sauce. Spoon sauce over chicken and serve immediately.

On a personal note, this may or may not be my last dish I profile this month because I am in the process of moving to a different apartment (i.e. cheaper rent) so, in the meantime, I'll leave you with a preview of where I'll be preparing future stunts. Hopefully my kitchen will remain this clean...


Monday, August 13, 2012

Spicy Beef and Sausage Ravioli with Roasted Tomato Onion and Garlic Marinara

Spicy Beef and Sausage Ravioli with Roasted Tomato Onion and Garlic Marinara


Within my first month of food blogging I went looking for a chicken parmesan recipe after I saw an advertisement while I was channel surfing one evening. I don't remember what the ad was trying to sell, but I remember it noting chicken parmesan. I ate the dish a few times during my trip to the Philippines to meet my wife's family and I immediately wanted to replicate the dish. I found a recipe from Pam of For the Love of Cooking that used a marinara sauce from scratch, but it required some equipment I didn't have at the time (an immersion blender and a Dutch oven), so I used store bought sauce.

With time, these issues have resolved themselves so I wanted to return to this recipe, in part, because I felt the original was incomplete without it. This also represented a perfect opportunity to show my appreciation for Kaitlin of I Can Cook That and use an item I won in the giveaway she hosted.

The Challenge

Successfully prepare the second half of a dish I cooked previously.

The Source

I used store-bought ravioli, but the sauce is adapted from For the Love of Cooking.

Ingredients

5-6 tomatoes (fresh from the garden if you can)
1/2 sweet yellow onion, diced into chunks
5-6 cloves of garlic
1-2 tablespoons olive oil
1 teaspoon dried basil
1 teaspoon dried oregano
Pinch of crushed red pepper (or more)
Kosher salt and fresh cracked pepper, to taste
1 28-ounce can of crushed tomatoes
1 teaspoon sugar (optional)
Dried oregano, to taste
fresh basil leaves, chiffonade
Parmesan cheese
1 package Buitoni Spicy Beef & Sausage Ravioli (or any other desired pasta)


Method

1. Preheat the oven to 375° Fahrenheit and heat a large pot of water to a boil. Score the tomatoes by removing the stems, then gently cut an X on the bottom of the tomatoes. Blanch the tomatoes by adding them to the boiling water for 10-15 seconds. Remove from water and immediately put into an ice bath to stop any carryover cooking. Once the tomatoes have cooled, gently peel off the skin.

Scored Tomatoes

Blanching Tomatoes

Shocking Tomatoes in Ice Bath

2. Halve the tomatoes and put on an aluminum foil lined baking sheet. Arrange the onion chunks around the tomatoes. Put the garlic cloves inside the tomato halves so the tomatoes will help prevent the garlic from burning and infuses the tomato with the roasted garlic flavor. Season the tomatoes, garlic and onions with the dried basil, oregano, Kosher salt, and pepper to taste. Drizzle with olive oil and roast for 30 to 40 minutes or until the tomatoes, onions and garlic are tender, sweet and juicy. Do not over cook them because the tomatoes will dry up.

About to be Roasted

3. Remove the roasted tomatoes and onions from the oven and put in a large Dutch Oven with the crushed tomatoes and pureé with an immersion blender. Taste and re-season with sugar (if desired), basil, oregano, salt or pepper, if needed. Cover with a lid and simmer for 2 to 4 hours

Roasted Vegetables about to be Pureéd

Simmering

4. During the last 30 minutes, bring a large pot of well-salted water to a boil. Drop your pasta in the water and cook until 1 minute less than the box suggests, reserving 1 cup pf pasta water. Drain the pasta in a colander and place in a large saute pan over medium low heat. Add spoonfuls of the marinara and toss to coat. Thin out the sauce with the reserved pasta water if necessary. Garnish with parmesan and fresh basil. Serve immediately.

Ravioli Boiling

Successful?

The specific flavor of ravioli was a request by my wife. While I don't think I'd eat this specific ravioli filling again, the extra work with the sauce was definitely worth it, when compared to Michael Chiarello's recipe.

Lastly, I wanted to note here that I normally don't advocate the use of dried herbs but in the case roasting vegetables in step 2, fresh herbs would burn so this is an exception.