Showing posts with label lemon zest. Show all posts

Sunday, August 16, 2015

Smoked Salmon Ravioli with Cream Sauce for a Back to School #SundaySupper

Smoked Salmon Ravioli with Cream Sauce for a Back to School #SundaySupper


As I stated in my preview I published last Thursday, this week's #SundaySupper theme is Back to School where we are sharing ideas for your lunchbox, after school snacks, school day breakfasts and dinners. For it, I've decided to approach the theme with a dish that works well on busy school nights and when I need to get supper on the table in an expeditious manner, I often turn to pasta dishes.

Inspiration Behind the Dish

For this dish, I went back to the same company where I purchased squid ink tagliolini for a dish I published last month. This purchase was different however, because my prior dish was a spontaneous decision. This wasn't. Their selection of filled pasta included flavors such as mushroom, cheese and pumpkin but what caught my eye was this smoked salmon ravioli. The Flavor Bible noted ingredients such as cream, dill garlic, butter and lemon pair well with smoked salmon and found a sauce that utilized these ingredients.

Dish Details

I adapted the sauce from a recipe I found on recipe.com

Ingredients

Kosher salt
1 pound smoked salmon ravioli
2 tablespoons unsalted butter
3 green onions, sliced thin
2 clove garlic, minced
1 cup whipping cream
1 tablespoon chopped fresh dill
1 teaspoon lemon zest
2 tablespoons shredded Parmesan cheese
Freshly ground black pepper
Dill sprigs (for garnish)

Method

1. Boil the pasta. Bring a large pot of well salted water to a boil over high heat. Drop the ravioli into the water and boil according to the directions on the package. Drain then set aside and keep warm.

2. Prepare the cream sauce. In a large skillet, melt the butter over medium heat. Once melted, add the green onions and garlic to sweat, approximately 3 minutes. Deglaze the pan with the cream, then add the lemon zest and dill. Bring the sauce to a boil, then reduce to a simmer until the sauce thickens, approximately 5 minutes. Remove from heat, then stir in the Parmesan. Taste and adjust seasoning with salt and pepper, if necessary. To plate, place ravioli into warmed bowls, then drizzle the ravioli with the cream sauce. Garnish with fresh dill and serve.


Final Thoughts

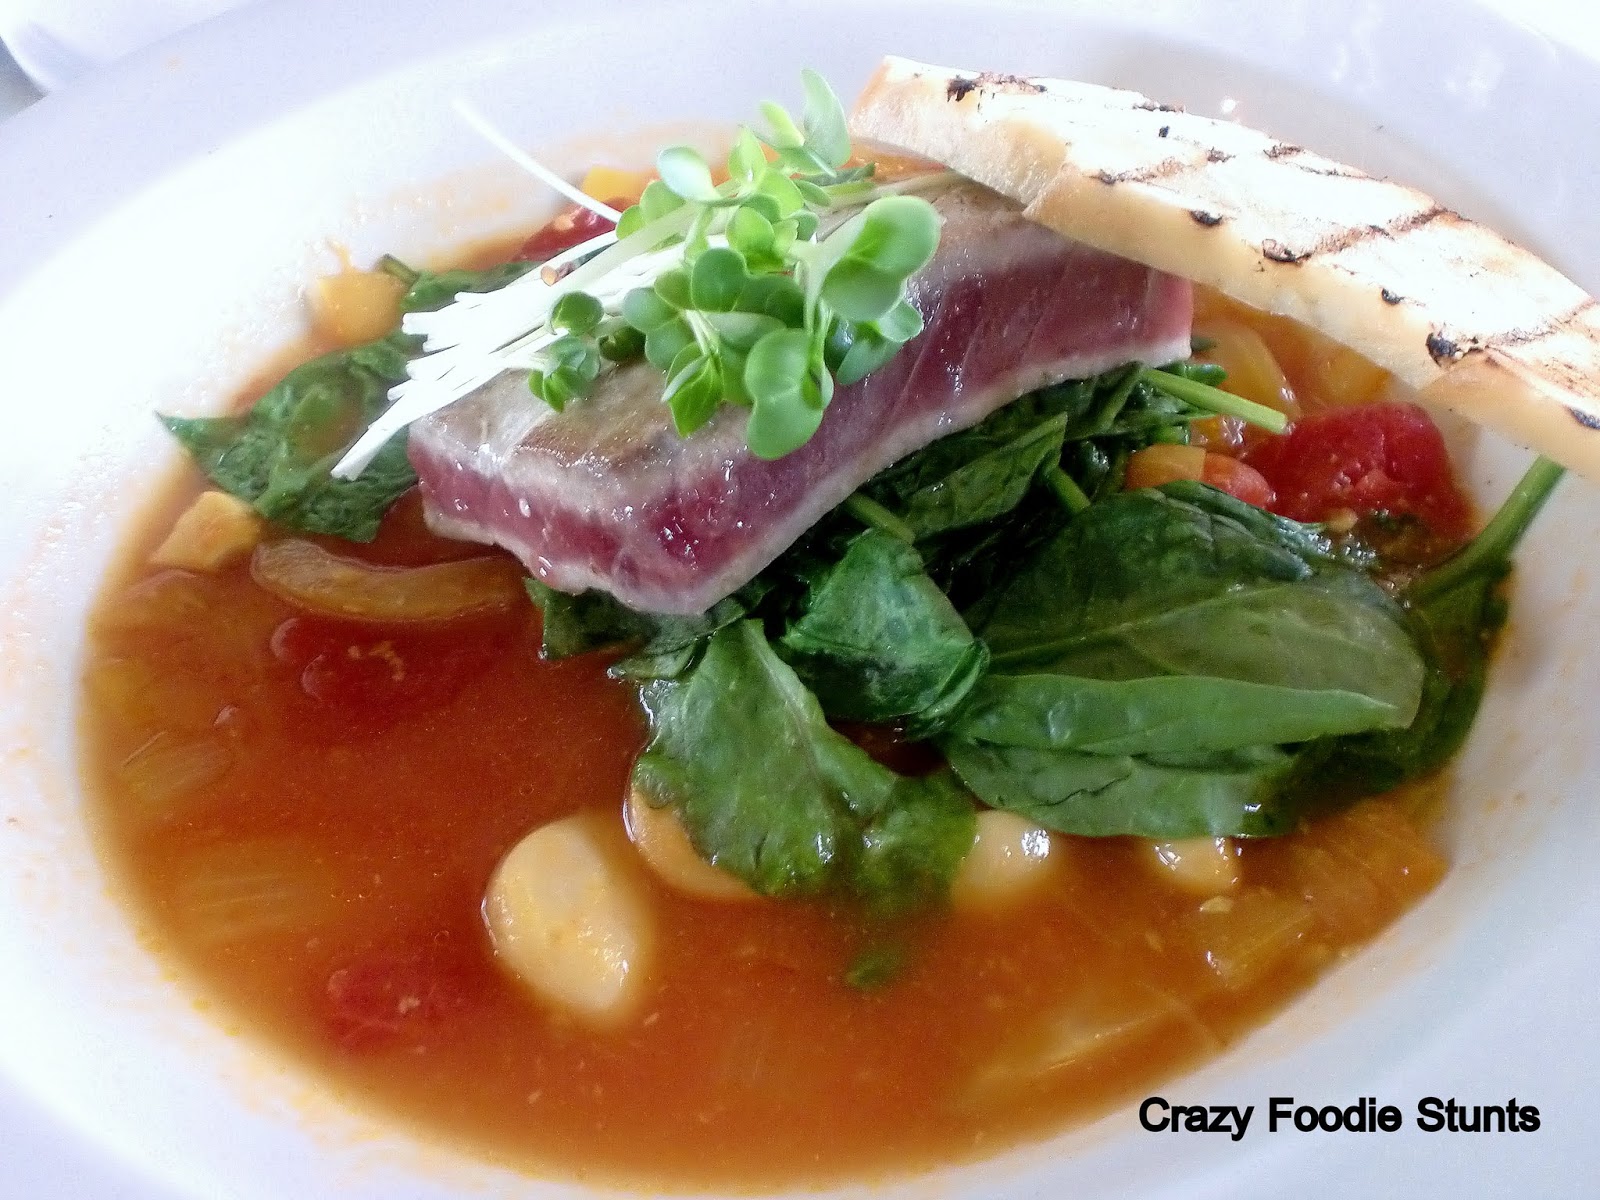
From a technique standpoint, I normally advocate to undercook the pasta and finish it off in the sauce, but I chose to fully cook here and top the pasta with the sauce for presentation purposes. If you can't find smoked salmon ravioli, most any seafood filling can be an acceptable substitute, or you can add the salmon into the sauce and substituting the ravioli for longer pasta such as lingiune, sticking more closely to the original recipe.

I wasn't happy with how I garnished the dish because the dill looks like something you'd pull out of the drain of your shower while cleaning the bathroom. The flavor profile was definitely present was because both my Mrs. Stuntman and my daughter enjoyed the dish. I'd like to thank Caroline of Caroline's Cooking for co-hosting this week's event with me and please be sure to check out the other dishes offered to make "Back to School" easier this week.

Getting Started On School Days
Ideas for the Lunchbox
After School Snacks and Beverages
School Night Suppers
Sweets to End the Day
Sunday Supper MovementJoin the #SundaySupper conversation on twitter on Sunday! We tweet throughout the day and share recipes from all over the world. Our weekly chat starts at 7:00 pm ET. Follow the #SundaySupper hashtag and remember to include it in your tweets to join in the chat. To get more great Sunday Supper Recipes, visit our website or check out our Pinterest board.

Would you like to join the Sunday Supper Movement? It's easy. You can sign up by clicking here: Sunday Supper Movement.

Sunday, May 4, 2014

Olive Oil Cake with Strawberry-Red Moscato Sorbet and Moscato Zabaglione for a National Moscato Day #SundaySupper with Gallo Family Vineyards

Olive Oil Cake with Strawberry-Red Moscato Sorbet and Moscato Zabaglione for a National Moscato Day #SundaySupper with Gallo Family Vineyards


In a moment of self-evaluation, I must admit I'd love to be a cook at a fine dining establishment if money wasn't a concern-not the chef because I wouldn't want the responsibilities that accompany the title. There are several reasons I have yet to achieve it but you might say it's a long term goal. I realized this fact after examining many of the dishes I have produced here. I always attempt to present my food in a manner that an expensive restaurant would be proud to serve to a customer. Sometimes I get close; often I don't. It's a continual process of learning by trial and error.

I am also like many savory chefs because I don't prepare many desserts and it isn't a skill that is utilized often. I attempted to produce a gourmet dessert last summer for #SundaySupper, however I was happy with the flavors but not its presentation. It's one of the reasons I enlisted the assistance of Jenni Field of Jenni Field's Pastry Chef Online for this dish.

What inspired it in the first place? Quite simply, Gallo Family Vineyards and their celebration of National Moscato Day, which is this upcoming Friday, May 9th. Did you know that Gallo Family Vineyards produces three Moscato wines: red, white and pink? I recommend checking them out. If you're unsure of where to find Gallo wines, they have a convenient store locator and to incentivize you, Gallo has provided a $1 digital coupon. Please also check out Gallo Family Vineyards on facebook, twitter, instagram and YouTube. Compensation was provided by Gallo Family Vineyards via Sunday Supper, LLC. The opinions expressed herein are those of the author, and are not indicative of the opinions or positions of Gallo Family Vineyards.


Let's discuss the dish for a moment. Since Gallo Family Vineyards sells three Moscato wines, I thought I'd use all three in one composed dish. Olive oil cakes have fascinated me because I find the flavor to be rather muted and was curious to see if it was able to stand on its own. The recipe I adapted used Vin Santo, but I substituted the white Moscato. I also need to note here that Chef Field assisted me in adapting the recipe that served eight to ten using a nine-inch springform pan to individualized portions. As my title suggests, I used the red Moscato in the sorbet and the pink Moscato in the zabaglione. Speaking of a zabaglione, I had never heard of it until I learned that the French call it a sabayon. It's often served in a cocktail glass but I decided to use it as a sauce for this dish. Additionally, Chef Field also identified the tuile. I used one because I think it gives a dessert an elegant presentation and I wanted the experience baking them.

The Challenge

Earlier this year, I prepared a spicy dish to pair with Gallo Family Vineyard's white Moscato so I wanted to use Moscato in a dessert dish to exhibit its versatility, in addition to attempting a fine dining presentation.

The Source

I adapted the sorbet from Dish with Clarissa, the zabaglione from epicurious and the tuile from allrecipes.com. With the help of Chef Field, I adapted the Apple & Olive Oil Cake recipe I found on pages 232-234 of Cook Like A Rock Star by Anne Burrell with Suzanne Lenzer.

Ingredients

For the sorbet:
3/4 cup water
3/4 cup granulated sugar
1 1/2 pounds strawberries (thawed, if frozen)
1 1/2 cups Gallo Family Vineyards Red Moscato
Juice from 1 lime

For the tuile:
1/2 cup (1 stick) unsalted butter, at room temperature
1 cup confectioner's sugar, sifted
4 egg whites
1/2 teaspoon vanilla extract
3/4 cup all-purpose flour
5 tablespoons unsweetened cocoa powder

For the cake:
5 large egg yolks
7 large egg whites
3/4 cup granulated sugar
1/2 teaspoon cinnamon
Zest from 1 lemon
3/4 cup extra virgin olive oil
1/2 cup Gallo Family Vineyards White Moscato
1 cup all-purpose flour
1 pinch kosher salt
Cooking spray

For the zabaglione:
6 egg yolks
1/3 cup granulated sugar
3/4 cup Gallo Family Vineyards Pink Moscato

Sliced strawberries and sifted confectioner's sugar, for garnish

Method

1. Prepare the sorbet: Combine the water and sugar into a small saucepan and place over medium low heat until the sugar dissolves, then remove from heat to create a simple syrup. Blend together the simple syrup and the remaining sorbet ingredients. Once smooth, pass the sorbet base through a sieve to remove any seeds(an offset spatula might be needed to speed up the process), then add to your ice cream machine and use according to the manufacturer's instructions. Once finished set aside in the freezer until the other components are finished. I recommend preparing this a day or two before serving to give the sorbet time to fully solidify.


2. Prepare the tuile batter: Place the butter and sugar in a large bowl and beat with an electric mixer on medium high setting. Add the egg whites one at a time, then the vanilla. Lower the speed on the mixer to medium and beat in the flour and cocoa until just combined. Cover and refrigerate for 1 hour or more.

3. Bake the tuile: While the batter rests, preheat the oven to 325° Fahrenheit and make a stencil out of cardboard. (I cut out a triangle but you can use any shape you desire.) Once the batter has rested, line a sheet pan with parchment paper or a silicone baking mat. Place the stencil on the baking mat (parchment) and place a small dollop of batter in the middle. Use an off-set spatula to evenly spread the batter so it is thin and reaches the edges of the stencil. Repeat this process to make more tuiles. Place in the oven and bake until the edges are slightly browned, approximately 8 to 10 minutes. Remove from the oven. The tuiles are pliable while hot and may be draped over a rolling pin to harden and cool for a more dramatic presentation. This can be done earlier in the day the dessert is served.


4. Prepare the cake batter: Preheat the oven to 350° Fahrenheit Combine the egg yolks, sugar, cinnamon and lemon zest in a large bowl. Beat the mixture with a whisk until it thickens, is pale and doubles in size, then whisk in the olive oil, Moscato and flour in that order. Set aside. In a separate bowl, use a mixer's whisk attachment to beat the egg whites and salt until stiff peaks form. Fold the egg whites into the original bowl, one-third of the whites at a time.


5. Bake the cake: Drop a circle of parchment into each space of a muffin pan then spray each with the cooking spray. Fill each muffin space up to 3/4 of the way full with the cake batter and bake in the oven for 20 to 22 minutes or until the cake registers an internal temperature of 200° Fahrenheit. Chef Field recommends allowing the cakes to cool in the pan upside down to prevent them from collapsing.


6. Prepare the zabaglione and finish the dish: While the cake is resting, prepare the zabaglione. Whisk the egg yolks and sugar in a large metal bowl, then gradually whisk in the Moscato. Set the metal bowl over a saucepan of simmering water (Ensure the water does not touch the metal bowl.) and continue to whisk the mixture until thick, foamy and the mixture reaches 160° Fahrenheit. To plate, spoon some zabaglione onto a plate, place the cake onto the zabaglione, and spoon some sorbet off on one side of the cake, then garnish with a tuile, strawberries and sifted powdered sugar.


Successful?

Unfortunately, I am unable to judge whether or not the dish would be suitable to be served at a fine dining restaurant, but I hope I was able to display Moscato's versatility. I'd also like to express a sincere gratitude towards Chef Field for her assistance with this dish.

Happy Moscato Day!

Before you go, please check out the other bloggers celebrating the holiday in this week's #SundaySupper event:

Appetizers and Mains:
Beverages, Breakfast, and Sweets:

Join the #SundaySupper conversation on twitter on Sunday! We tweet throughout the day and share recipes from all over the world. Our weekly chat starts at 7:00 pm ET.  Follow the #SundaySupper hashtag and remember to include it in your tweets to join in the chat. Check out our #SundaySupper Pinterest board for more fabulous recipes and food photos.

Would you like to join the Sunday Supper Movement? It’s easy. You can sign up by clicking here: Sunday Supper Movement.


Friday, September 27, 2013

Basil and Chocolate Chip Ice Cream with Lemon Curd

Basil and Chocolate Chip Ice Cream with Lemon Curd


Once again, I must thank you for your patience this month. If I can be candid for a moment, I'm finding it difficult to organize my daily schedule because after I prepare dinner, eat and then wash the dishes, I'm exhausted. Regardless, since I published my last composed dessert, I caved and purchased an ice cream maker. I've made a point in the past that I've been able to do so without one when I published a gelato, a sorbet and an ice cream but (especially with the roasted figs dessert) I'm finding that I'm happiest when ice cream is one component of a dish.

If you don't own one and would like to, I recommend checking out the about.com article before purchasing one. I chose a pre-freeze bowl option because hand-churning a manual type might seem fun for the first couple of times, I knew I'd tire of it eventually and the addition of ice and rock salt is too cumbersome for me. The electric freezer machines were, for the most part, too expensive.

Once the machine was delivered, I consulted The Flavor Bible which noted basil and lemon complementing chocolate. While I could understand theoretically the acidity of the lemon contrasting the sweetness of the chocolate, the addition of the basil intrigued me. It also triggered a memory I have of a basil gelato I ate at Yoshi's in San Francisco several years ago while Mrs. Stuntman and I celebrated our anniversary. I was skeptical at first of an herb in a dessert application. I was only familiar with in a savory setting but left that evening convinced. It then occurred to me that mint is an herb commonly used in desserts but I wanted to explore the idea further.

The Challenge

Interesting flavor profiles.

The Source

For the ice cream custard, I adapted the recipe from epicurious and the lemon curd from the Wall Street Journal.

Ingredients

2 cups whole milk
3 tablespoons fresh basil, chopped plus more for garnish
1 pinch kosher salt
1/2 cup plus 2 cups white sugar, divided
4 large plus 10 egg yolks, divided
3 whole eggs
1 cup and 2 tablespoons plus 1/2 cup heavy cream, divided
Juice from 4 lemons
1/2 cup semi-sweet chocolate chips

Method

1. Prepare the ice cream custard: Combine the milk, 1/4 cup sugar, basil and salt in a saucepan and bring to a boil, stirring along the way. Once it reaches a boil, remove it from the heat and let the basil steep for 30 minutes.


Transfer the mixture to a blender (reserving the saucepan) and blend until the basil is ground finely.


While the basil steeps, beat 4 of the yolks and 1/4 cup sugar in a separate bowl with an electric mixer until thick and pale. Add the milk to the egg yolks in a steady stream and beat to combine. Pour mixture back into the reserved saucepan and cook over medium heat continually stirring with a wooden spoon until the temperature reaches 175° Fahrenheit on an instant read thermometer. (Do not let the mixture boil!)


Strain the mixture into a metal bowl, add 1/2 cup heavy cream and then follow the directions on your ice cream maker, adding the chocolate chips during the last few minutes of churning.


2. Prepare the curd: Combine the remaining 10 egg yolks, 3 whole eggs, remaining 2 cups sugar and the lemon juice in a mixing bowl.


Heat cream until it just begins to simmer in a medium saucepan, then pour into the egg yolk mixture in a steady stream while whisking. Then pour it back into the saucepan and cook over medium heat until thickened and darkened in color, approximately 5 minutes.


Pour the mixture into a metal bowl, stir to cool and cover with a plastic wrap. Refrigerate for 4 or more hours to set. To plate, spoon the curd onto a chilled plate and top with a scoop or two of ice cream.

Successful?

If I were to prepare this ice cream again, I might use a chocolate swirl because the basil and the lemon were definitely the dominant flavors, however the flavors were still well balanced.

In other news, Mrs. Stuntman took me, her father (visiting from overseas) and our daughter to Napa Valley last weekend. I don't do restaurant reviews but I thought I might note my experiences.

Friday night we ate at The Royal Oak at the Silverado Resort where I had a filet mignon with a roast shallot and smoked sea salt compound butter.


Saturday we had a 4-course lunch while on a tour on the Napa Valley Wine Train.

The appetizer course of shrimp, flavored cheddar, and grapes.


For the second course, I ate the bay shrimp and pumpkin soup.


The entreé course was a pan seared ahi tuna with a saffron tomato broth and grilled bread.


Finally, I had the vanilla bean crème brûlée with a blueberry garnish.


Sunday, we went into Yountville to the legendary Bouchon Bakery. Among the items we purchased were some macarons and a fig tart.


Tuesday, June 11, 2013

Light Stunt: Grilled Flank Steak with Chimichurri Sauce

Grilled Flank Steak with Chimichurri Sauce


I prepared this dish out of curiosity, more than anything. I had seen it prepared by a number of Food Network personalities and even a local TV journalist put one on her personal blog. Chimichurri sauce originates from Argentina and traditionally pairs with grilled beef but can also be paired with chicken, fish or used as a marinade. From the recipe, I could determine that it's similar to a Genovese pesto with similar ingredients (raw herbs, garlic and oil) but I also noted that, because this sauce is served cool, it would be a refreshing contrast to grilled proteins.

The Source

The sauce was taken from page 26 of the recipe guide of Top Chef University DVD set.

Ingredients

1 flank steak, about 2 pounds
Kosher salt
Freshly ground black pepper
1/4 shallot, peeled and chopped roughly
1 small clove garlic, peeled
3 tablespoons red wine vinegar
Juice from 1 lemon
1 pinch lemon zest
1/4 teaspoon red pepper flakes
1/2 bunch fresh chives
1/4 bunch fresh flat leaf parsley
Leaves from 2 sprigs fresh thyme
3 sprigs fresh tarragon
1 tablespoon fresh oregano leaves
1 cup extra-virgin olive oil

Method

1. Remove flank steak from the refrigerator and let it come to room temperature, no more than 30 minutes. Pat the steak dry with paper towels and season it with salt and pepper. Heat a grill or grill pan over medium-high heat. Sear the steak over the grill about 6 minutes per side for medium rare, but check for doneness.
Once the proper temperature has been reached, remove and set aside for 5 minutes to allow for carryover cooking.

2. While the steak is resting, blend the shallot, garlic, lemon juice and lemon zest plus 1 tablespoon olive oil in a blender until the ingredients form a smooth paste. Add the herbs with the red pepper flakes and pulse until the herbs are chopped and the mixture forms a textured pureé. Add the oil and blend until the sauce is emulsified. All of the remaining oil may or may not be needed. To plate, slice the flank steak across the grain and serve topped with the sauce.

Successful?

I had a little difficulty categorizing this dish because I originally planned to just practice my presentation skills, but I also noted how quickly the dish came together which would make it perfect fir a weeknight meal.

In other news, did you see episode two of Next Food Network Star? I have a couple of questions: 1) Where was Bob and Susie this week? 2) How is Danushka still competing? The only explanation I can offer is that her burger was better than her competitors this week. I like the format of the challenge because it forced the contestants to effectively communicate their message but I was a little bored by the topic of burgers.

What are your thoughts? Reply in the comments.

Saturday, May 18, 2013

Sorbetto di Limone and a Winner

Sorbetto di Limone


And we have a winner! Congratulations to Toni of Food.(Just Sayin'). I was going to request a prompt reply, but we've already touched base.

So the rest of you don't feel left out, I have profiled another dish from Chef Viviani's cookbook here. It was originally supposed to be a Mother's Day dessert for my family's gathering but it was a watery mess the morning of, so I had to wait another day before I could publish it.

The Challenge

Homemade food made from scratch.

The Source

Taken from page 231 of Fabio's Italian Kitchen by Fabio Viviani with Melanie Rehak.

Ingredients

2 cups white sugar
2 cups water
3 tablespoons vodka
2 cups lemo juice
Zest from 2 lemons
1 heaping tablespoon mascarpone cheese

Method

1. In a large saucepan, combine the sugar, water and vodka and bring to a boil, then reduce heat to a simmer until the liquid is clear and syrupy, approximately 5 minutes. Remove from heat and cool for 15 minutes.


2. Once cooled, combine the syrup with the lemon juice and lemon zest in a glass or ceramic bowl and freeze for 60 minutes.


After the hour, stir in the mascarpone and adjust for sweetness if necessary. Check check back occasionally: once every hour or two, when awake and/or present, stirring each time and using a fork to scrape down the sides of the bowl when necessary, for 24 hours. The sorbet is done when it's set: thick enough to hold onto a spoon but thin enough to drink out of a glass.


Successful?

I made a double batch, so I believe it's why it took so long to freeze. From a flavor standpoint, it was very light and refreshing, but from an execution standpoint, the zest pieces were a little too coarse.

Friday, January 25, 2013

Mustard-Brown Sugar Glazed Salmon with Lemon Rice Pilaf and Paying It Forward

Mustard-Brown Sugar Glazed Salmon with Lemon Rice Pilaf


This dish will separate itself from the others I've posted here because I'm trying to save my sanity, not display my dementia. Mrs. Stuntman grew up in the Philippines eating steamed white rice at every meal. Don't get me wrong. I like rice, but the rice she normally prepares is very bland.

Come to think of it, I could have probably used this dish this past Sunday during the retro recipe examples because whenever I went out to restaurants as a kid, I always ordered rice pilaf as a side dish, if given the choice.

The Challenge

Add flavor to a side dish

The Source

The salmon was adapted from page 278 of America's Test Kitchen Family Cookbook Third Edition: Cookware Rating Edition. For the rice, I used a Chef Ming Tsai recipe I found on foodnetwork.com.

Ingredients

For the rice:
2 tablespoons extra-virgin olive oil
1 large onion, diced
1 tablespoon fresh ginger, minced
1 tablespoon lemon zest
2 cups long-grain white rice
1/2 cup white wine
3 cups chicken stock
2 tablespoons fresh Italian parsley, chopped

For the salmon:
4 6-ounce salmon fillets, 1 1/4-inch thick
kosher salt
freshly ground black pepper
1/4 cup packed light brown sugar
3 tablespoons cider vinegar
3 tablespoons coarse-grain mustard
1 tablespoon vegetable oil
2 cloves garlic, minced

Method

1. Preheat the oven to 500° Fahrenheit. Prepare the glaze by whisking together the brown sugar, vinegar, mustard, garlic and oil. Season the glaze with 1/2 teaspoon kosher salt and 1/4 teaspoon freshly ground black pepper.


2. Prepare the rice: Heat the oil in a large skillet over high heat. Once the oil shimmers, add the onion, ginger, and lemon zest and sweat until soft, about 2 minutes. Add the rice and cook, stirring until the rice is opaque, about 5 minutes. Deglaze with wine and reduce by 80 percent. Add the chicken stock, cover and simmer over low heat for 25 to 30 minutes.


3. While the rice simmers, cook the salmon: Remove any pin bones from the salmon. Pat the fillets dry with a paper towel and season them with kosher salt and freshly ground black pepper. Place the fillets about 1-inch apart on a lightly-oiled aluminum foil-lined baking sheet. Bake for 5 minutes. Baste the glaze over the tops and sides of the salmon. Return to the oven and bake until the fish turns from translucent to opaque, about 5 minutes. Brush the glaze again and serve on a bed of the rice and garnish with parsley.


Successful?

I recommend seasoning the rice with salt and pepper to taste before plating, but the rice is definitely more flavorful. The salmon was well-balanced in flavor.

In other news, one of my food blogger friends, Jenni of Pastry Chef Online is hosting a linky party this month spotlighting other blogs we enjoy. I do have a blogroll, but I haven't updated it in a while so I wanted to add to it.

I've noted Willow of Will Cook for Friends a number of times here and admire her ambition for learning about food, but had not added her to my list of favorites so I wanted to correct that oversight.

I met Stefanie of Sarcastic Cooking via foodbuzz when it was still around after she was featured with some degree of regularity. She prepares delicious food and I also lover her photography.

Sarah of Crispy Bits & Burnt Ends actually found me, but I have since come to appreciate her writing style.

Mijune of Follow Me Foodie is a food writer out of Vancouver, British Columbia. I enjoy her wit and humor.

Joanne of Fifteen Spatulas and I share the same philosophy on food: homemade, from scratch and with step-by-step pictures. I've also met her in person and can say that she is very easy to work with.

Check out the other Pay It Forward participants in addition to Jenni's list, which can be viewed on her website, here.

Wednesday, January 2, 2013

Herbed Speckled Crab Ravioli with a Lemon Butter Drizzle

Herb Speckled Crab Ravioli with a Lemon Butter Drizzle


Happy New Year!

This past Sunday afternoon I hosted lunch for some friends I hadn't seen in a while as an early New Year's celebration. I would call them foodies, knowing they've eaten at some of the best restaurants here in the San Francisco Bay Area, so I knew I had to bring my A-Game.

I had been planning this dish for more than a year when I was doing some research for my prior 'fresh pasta from scratch' dish which appeared on my last website. I wanted to get the basics down before I started to experiment, however I wanted to visit pasta from scratch again eventually. I needed a way to elevate my skill set from my last attempt. I hope you agree that I have found one.

The Challenge

Successfully prepare a more complex fresh pasta dish.

The Source

I've put together this dish from several sources. I took the pasta ingredients from about.com, but the pasta dough instructions were borrowed heavily from Chef Tomm Johnson of The International Culinary Center. His YouTube demonstration can be seen here. I adopted the crab filling from Tasty Adventures in addition to the sauce from Martha Stewart.

Ingredients

For the pasta dough:
3 1/3 cups all-purpose flour
1/4 cup fresh Italian (flat-leaf) parsley, finely minced
5 eggs
1 pinch kosher salt

For the filling:
1 cup fresh crab meat
1 shallot, finely minced
3/4 cup ricotta cheese
1 tablespoon fresh Italian parsley, finely chopped
1 tablespoon fresh basil, finely chopped

For the drizzle:
1/2 cup (1 stick) unsalted butter
2 teaspoons fresh lemon zest
2 teaspoons lemon juice
1 tablespoon fresh basil, cut into a chiffonade
freshly grated Parmesan

Method

1. Prepare the filling: Combine all the filling ingredients in a medium bowl and refrigerate until ready to use.


2. Make the pasta dough: On a clean, flat work surface (I find a deep cookie sheet works well), place the flour in a mound and make a well in the center so the flour resembles a volcano. Add the salt in the well. In a separate bowl, combine 4 eggs and parsley and add to the well.


Stir the wet ingredients into the flour gradually. Once combined, knead the dough until both the inside and outside of the dough is tacky but not sticky, using more flour when necessary, about 8 to 15 minutes. Once finished, wrap in cellophane and refrigerate for 30 minutes.


3. Roll the dough: After the dough has rested, remove from refrigerator and cut the dough into 4 equal size portions. Cover three of the four portions and flatten the remaining portion to 1/2 inch thick. Pass the portion through the widest setting of a pasta roller. Then fold the dough into thirds and pass it through the pasta roller again at it's widest setting with the folds perpendicular to the roller. Repeat this once more for a total of three passes through the widest setting. Then pass the dough through the roller once at increasingly smaller settings. (I have an Atlas pasta machine with six settings and went to the fifth one.) Repeat the process with the remaining three dough portions.


4. Make the ravioli: I purchased a ravioli press to construct my ravioli in this manner. If one isn't available, lay a sheet of pasta onto a flat surface and spoon out one-half teaspoon full of the ravioli filling one inch apart and one inch from the edge of the pasta sheet, two-by-two if possible. Whisk the remaining egg in a small bowl brush the egg in between each mound of filling. Lay a second pasta sheet over the first one and press down in between the filling, being careful not to puncture holes in the pasta sheet but pushing out as much air as possible. If not using immediately, make a bed of flour on a sheet pan and freeze the ravioli on the flour. Once frozen, transfer the ravioli to a resealable bag.


5. Finish the dish: Bring a large pot of salted water to a boil over high heat. Add the ravioli and cook until they float to the top. Meanwhile, melt the butter over medium heat in a large skillet until the butter foams but before it browns. Add in the cooked ravioli and 2 tablespoons of pasta water, lemon juice and lemon zest. Swirl to combine and transfer the ravioli to a bowl. Drizzle with the sauce, garnish with basil, and shower with some freshly grated parmesan. Serve immediately.


Successful?

Just barely. I finally met my match with this dish because of the problems I had throughout. My pasta dough kept tearing when I fed it through the roller at the widest setting. Once I got that issue resolved, I tried to use my ravioli press but kept puncturing holes in the pasta sheets once I layed the first sheet of pasta over the press. Ultimately, what I ended up doing was a hybrid of the two methods in step 4 above: cutting out individual raviolo and shaping each one individually in the press for a uniform size.


I made the dough Friday night and allocated about two hours to roll out the dough and make the ravioli Saturday afternoon. As I was into my sixth hour on Saturday evening with Mrs. Stuntman seeing my frustration growing, I suggested she start looking at take-out menus for dinner. My laborious efforts yielded less than twenty ravioli, however I only used half of the ravioli dough. I was too tired to continue. Because of this, I halved the ingredients in the drizzle which resulted in a muted lemon flavor.

In the end, the effort was well worth it. My friends appreciated the pasta from scratch (not fully knowing my struggles with it) and Mrs. Stuntman said it was her favorite tasting dish I've prepared to date, especially since crab is one of her favorite seafoods. Crab also makes the filling seasonal.

I'm actually thankful for my troubles with this dish because it is what I set out to do when I started this website: make food that is challenging for the home cook. Look for more challenging dishes in 2013. In fact, I already have ideas for my next pasta from scratch dish, elevating my game once again.