Showing posts with label fresh Italian parsley. Show all posts

Sunday, December 20, 2015

Chicken Cacciatore Pronto for a Last Minute Holiday Recipes #SundaySupper

Chicken Cacciatore Pronto for a Last Minute Holiday Recipes #SundaySupper


If I could be candid for a moment. I was going to publish this dish separately until I saw this week's #SundaySupper theme of Last Minute Holiday Meals, hosted by T.R. of Gluten Free Crumbley and Wendy of Wholistic Woman. I think it fits in nicely with the theme because it's a braised dish which is perfect for the weather, but it's chicken so it's not simmering for hours which means it can be prepared quickly.

Inspiration Behind the Dish

I have become very familiar with this dish over the years. If memory serves me correctly, the first time I prepared it was for a dinner party I hosted. At the time, I was still a novice cook that only knew to follow recipe instructions, but kept coming back to it once I realized how well thought out the dish is. It ended up having a profound influence on the direction of my cooking style.

Dish Details

I have adapted it over time but the source recipe can be found on page 166 of Michael Chiarello's Casual Cooking By Michael Chiarello with Janet Fletcher.

Ingredients

1/2 ounce dried porcini mushrooms
1 cup hot water
4 bone-in, skin-on chicken thighs
Kosher salt
Freshly ground black pepper
1 teaspoon olive oil
1 tablespoon garlic, minced
2 tablespoons plus 1 tablespoon Italian parsley, chopped
1 cup tomato purée
1 cup chicken stock

Method

1. Finish the mise en place. Place the dried porcini in a small bowl and pour the hot water over them and set aside for 30 minutes so the mushrooms rehydrate. While you're waiting, I recommend puréeing the tomatoes, mincing garlic and chopping parsley. Once the mushrooms are rehydrated lift them out of the water with a slotted spoon and chop, then set aside to reserve. Pass the water in which the mushrooms were soaked through a double layer of paper towels, then set aside and reserve.

2. Sear the chicken. Coat the bottom of a large skillet with a thin layer of olive oil (approximately 1 teaspoon) and place over medium-high heat. Season the chicken on both sides with salt and pepper, then place in the skillet, skin side down, to sear once the olive oil starts to smoke until well browned, approximately eight to ten minutes. Turn and sear on the second side, approximately two minutes, then remove from the skillet and set aside.


3. Layer flavor and simmer. Drain all but one tablespoon of the oil from the skillet and return to the stovetop over medium heat. Add the garlic and stir until it starts to color, then two tablespoons parsley and reserved porcini, stirring until fragrant. Add the tomato purée, chicken stock and reserved mushroom broth, scraping the bottom of the skillet to loosen any fond. Return the chicken to the skillet, skin side up and bring to a simmer, then reduce the heat, cover the skillet and simmer until the chicken is fully cooked through, approximately thirty minutes. Remove the chicken from the skillet, then raise the temperature to high, boiling the sauce to reduce and thicken, approximately five minutes. To serve spoon the sauce on the plate and top with chicken and garnish with the remaining parsley.


Final Thoughts

The word cacciatore is Italian for hunter and is considered a rustic dish out of central Italy that is commonly made with onions, tomatoes mushrooms and bell peppers, as I've previously demonstrated, however I like this version for extracting such incredible flavor from basic ingredients and, as I said above, it cooks quickly. Possibly the only ingredient that might seem exotic is the dried mushrooms, however I have found that they are readily available at most supermarkets. Chef Chiarello notes in his book that thighs are the part of the chicken that is best for braising because they're moister and, therefore, don't dry out as easily as say breast meat, for example. This dish taught me how to layer flavors and opened my mind to the concept of a mirepoix. I also find the utilization of the water used to soak the dried porcini in the braising fluid quite innovative.

I've prepared an entrée here, but don't miss the many other last minute holiday recipes of varying courses prepared for this week's #SundaySupper, which are below.

Beverages
Breakfast
Appetizers
Main Dishes
Side Dishes
Desserts
Quick and Easy Holiday Recipes #SundaySupper by Sunday Supper Movement


Sunday Supper MovementJoin the #SundaySupper conversation on twitter on Sunday! We tweet throughout the day and share recipes from all over the world. Our weekly chat starts at 7:00 pm ET. Follow the #SundaySupper hashtag and remember to include it in your tweets to join in the chat. To get more great Sunday Supper Recipes, visit our website or check out our Pinterest board.

Would you like to join the Sunday Supper Movement? It's easy. You can sign up by clicking here: Sunday Supper Movement.

Thursday, August 6, 2015

Presenting: Chicken Piccata

Chicken Piccata


For those of you unfamiliar with my earlier work, I started a series called Presenting: where I attempt to improve my photography and/or plating.

Inspiration Behind the Dish

On Sunday of Food and Wine Conference, I spent a huge portion of that day attending workshops to improve presentation of my food. One of the sessions I attended was Every Picture Tells A Story by Denise Vivaldo of Denise Vivaldo Group. If you're unfamiliar with her, she's absolutely fantastic. It was fun to hear her reminisce about being on the sets of big name TV shows of the 1980s and 1990s working behind the scenes as a culinary producer. The seminar wasn't entirely a trip down memory lane. She gave some great advice too.

Dish Details

One of the tips I picked up during her workshop was to purchase a mobile photography studio so once I got home from Orlando, I went on Amazon and I did. I'm not presenting anything new because I've already published Chef Fabio Viviani's version of this dish. I'm using the dish solely as a prop to practice my photography. I pretty much stuck to Giada's recipe found on foodnetwork.com, so I respectfully request to go there for it in its entirety.

Final Thoughts

The picture needed very little editing. I used my smartphone on auto settings. The only thing I really did was add my logo and cropped the picture of some negative space. I welcome constructive criticism so please comment with it.

Wednesday, July 1, 2015

Squid Ink Tagliolini with Bay Scallops and White Wine

Squid Ink Tagliolini with Bay Scallops and White Wine


Since visiting the Redmond farmer's market about a month ago, two have opened up closer to me in the city of Kirkland and I was able to get over to one that opens on Wednesday afternoons recently and picked up some arugula and basil, among other items.

Inspiration Behind the Dish

One of the venders present was a company called La Pasta LLC that was selling fresh pasta. I first dismissed their booth because I can make fresh pasta at home but when I passed by it again, I noticed they sold squid ink tagliolini so I made the purchase because I haven't been able to find squid ink locally. Yes, I've looked.

Dish Details

The Flavor Bible doesn't address squid ink directly but it does address squid and many of the foods that are complementary to shellfish also pair well with squid such as lemon, garlic, white wine, parsley and butter. I also googled other squid ink pasta dishes and the general sense was to use more seafood with a very simple sauce, so I used a linguini and clams dish from page 113 of Michael Chiarello's Casual Cooking by Michael Chiarello with Janet Fletcher as an inspiration but this is a Crazy Foodie Stunts original. I'd imagine that a version of this dish would be common at trattorias along the Italian coasts.

Ingredients

1/2 pound bay scallops
Kosher salt
Freshly ground black pepper
1 tablespoon olive oil
4 cloves garlic, minced
1 pound squid ink tagliolini
1/4 cup unsalted butter
3 tablespoons fresh flat-leaf parsley, chopped (for garnish)

Method

1. Fire a large pot of well salted pot of water over high heat. Separately while you wait for the water to boil, pat the scallops dry with paper towels, then season them with salt and pepper on both sides. Heat the olive oil in a large skillet over medium heat. Once hot, add the scallops to sear, approximately 2 minutes per side. Remove the scallops to a plate and set aside, then add the garlic and sauté until it starts to brown, an additional minute. Deglaze the pan with the wine and bring to a simmer, scraping the fond from the bottom of the pan. While the sauce is reducing, drop the pasta into the boiling water. (La Pasta LLC instructs a 3 minute boil but I boiled my tagliolini for only 2 minutes). Drain the pasta and add to the simmering wine, then toss with the butter until it melts. Serve into warm bowls garnished with the flat leaf parsley.


Final Thoughts

If squid ink pasta proves difficult to source, you could easily substitute egg linguine but if you're going to use dried pasta, start the boiling process before searing the scallops because dried pasta will need to boil longer. That being said, fresh pasta isn't really boiled, so much as it's blanched because it's normally just a minute or two until it floats to the top of the pot, which is the indicator that fresh pasta is cooked. Overall, Mrs. Stuntman wasn't sure what to think of the black pasta I served her but I appreciated the briny flavor the pasta added to the dish.

La Pasta LLC is so small, it doesn't even have it's own website but encourages you to 'Like' their facebook page. Unfortunately, they also are unable to ship outside the Puget Sound area. This is fresh (i.e. perishable) pasta, folks and they can't guarantee the quality of their product if they were to send it across the country. Instead, I highly recommend seeking out local pasta producers at a farmer's market near you.

If you do live in the area, they have storefronts in the Wedgewood neighborhood of North Seattle at 9118 35th Ave NE and in downtown Kirkland at 340 Parkplace Center in addition to summer booths at Columbia City Farmer's Market and Kirkland Wednesday Market on Wednesdays; Bellevue Farmer's Market and on Thursdays; Juanita Friday Market and Phinney Farmer's Market on Fridays; Bellevue Farmer's Market and University District Farmer's Market on Saturdays and lastly Capitol Hill Broadway Farmer's Market, Lake Forest Park Farmer's Market, Mercer Island Farmer's Market and West Seattle Farmer's Market on Sundays.

Monday, May 11, 2015

Spaghetti with Sausage and Peppers plus Updates

Spaghetti with Sausage and Peppers


Hello? Are you still there? I haven't published a dish in almost a month but I have still been busy working. My anniversary was a couple of weeks ago but Mrs. Stuntman and I decided to forgo a dinner at a nice restaurant in exchange for the opportunity to upgrade our cell phones. While Mrs. Stuntman got a newer version of an iPhone, I made the leap from a $12 flip phone to a Samsung Galaxy S5. This is relevant here because, in addition to opening an instagram account for this website, the pictures of this dish were taken with it primarily because it has a 16-megapixel camera which is better than the 12-megapixel quality of my point-and-shoot camera I had been using.

I also attended a photography seminar which was held through my local parks and recreation department which was moderated by Duke Conrad who's an award-winning nature photographer. I encourage you to check out his portfolios at 500px.com and flickr.

The third update is that I have re-written my About Me page. In it, I summarize a new direction here from execution-focused challenges to flavor profile-focused challenges. As such, I will be announcing some format changes. I'll start with the inspiration behind the dish, then the dish details (which will include the recipe) and finish with some final thoughts. This dish will be my first under the new format.

Inspiration Behind the Dish

A contributing factor in why I went so long without publishing a here is because of Mrs. Stuntman's contributions to the dinner table as of late. She has been purchasing a lot of prepared food. Most of it is the type of food that is already fully-cooked and the only thing needed is to reheat and serve. Don't get me wrong, there isn't anything wrong with these items but it's just not appropriate to publish here at face value. So, while I was rummaging around the refrigerator on a recent evening, it occurred to me that the smoked mozzarella with artichoke and garlic chicken sausages could be used in a classic Italian pairing of sausage and peppers.

Dish Details

I adapted this epicurious recipe to accomodate a few ingredient substitutions in addition to the sausages noted above. First, I substituted spaghetti for the bucatini simply because I didn't want to pay the additional dollar for the bucatini. Bucatini is the same shape as spaghetti with the exception of a hole running through the pasta so it resembles a straw or a hose. Second, I puréed my tomatoes instead of crushing them by hand. I also substituted fresh oregano leaves for the dried and used regular parmesan instead of the Grana Padano. This dish would easily fit onto any casual Italian menu.

Ingredients

1 tablespoon extra-virgin olive oil
8 ounces smoked mozzarella with artichoke and garlic chicken sausages (approximately 3 links), casings removed
1 large onion, chopped
1 medium red bell pepper, julienned
1 medium yellow bell pepper, julienned
1 tablespoon garlic, minced
1/4 cup dry white wine
1 28-ounce can San Marzano tomatoes, puréed
1 tablespoon fresh oregano leaves, chopped
Kosher salt
Red pepper flakes
1 pound spaghetti
1/2 cup fresh Italian parsley leaves, chopped
1/2 cup freshly grated Parmesan

Method

1. In a large pot, bring to a boil at least 4 quarts of salted water to a boil over high heat. Separately in a large skillet, heat the olive oil over medium-high heat. Once the oil starts to smoke, add the sausage and break it up into bite size pieces until well browned, approximately 4 minutes. To the sausage, add the onion and peppers to sweat and adjusting the heat as needed, approximately 8 minutes.


2. Add in the garlic and stir until it becomes redolent, one or two minutes. Deglaze with the white wine, scraping up any brown bits and reducing for minute or two. Add in the tomato purée, 2 cups of the pasta water, then season with salt, red pepper and oregano. Simmer for approximately 20 minutes until the sauce reduces and becomes flavorful. Approximately 10 minutes in, drop the spaghetti into the boiling water and cook for two or three minutes less than the box instructions direct. Once the pasta is al dente, reserve 1 cup of the water, then drain and add to the sauce. Toss the pasta with the sauce and the parsley. Serve in warmed bowls garnished with Parmesan.


Final Thoughts

While not my most creative effort, it still was well balanced and perfect for a quick weeknight meal.

Monday, March 16, 2015

Risotto with Mascarpone and Prosciutto

Risotto with Mascarpone and Prosciutto


A couple of weeks ago, I asked my facebook friends' favorite risotto flavors. Parmesan was a popular flavor. Mushrooms was also fairly common. I was a little surprised by the answers given primarily because they're ubiquitous. Furthermore, I examined several Italian restaurant menus but I didn't find much more creativity with their risottos.

I don't know about you, but I get bored with common flavors. It's the reason why I've profiled one with Japanese ingredients, one where I substituted red wine for white and not one but two versions where I replaced the Arborio rice with another starch.

You might be curious to note that I used rather pedestrian flavors but I didn't prepare this risotto to demonstrate interesting ingredient pairings for the sake of taste. The reason I'm presenting this dish to you is due to it's viscosity. A risotto is normally finished off with butter and parmesan but in this case, gruyere and mascarpone is substituted for the parmesan which resulted in a creamier consistency. In addition, the prosciutto also added a contrast in texture because it is crispy, when prepared in the manner the recipe suggests. Other than tasting it for seasoning after the herbs and cheese have been added, I didn't alter this dish from foodnetwork.com so I kindly request you go there for it.

Successful?

I'm happy to report that this risotto has replaced the one with peas and bacon as Mrs. Stuntman's new favorite. In fact, I have a funny feeling this dish will be making a encore appearance on my dinner table sometime soon. I can only conclude that there is something to these vanilla flavors after all. Whew knew?

Sunday, August 3, 2014

Grilled Sirloin with Caramelized Shallot and Roasted Garlic Compound Butter for the Beef Checkoff #SundaySupper

Grilled Sirloin with Caramelized Shallot and Roasted Garlic Compound Butter for the Beef Checkoff #SundaySupper


I withheld the entreé I ate at A Land Remembered from my review of the Food and Wine Conference because I was unexpectedly inspired that evening. Weeks prior, it was announced that I was lucky enough to be chosen to participate in this week's #SundaySupper event sponsored by The Beef Checkoff and I had ideas of what I was going to prepare for it but hadn't worked it out fully yet. Well, that evening my original idea was sidelined after eating the filet I ordered. The filet itself was prepared perfectly but what sent it over the top was pairing the cloves from the roasted garlic garnish with a bite of the beef. I left that evening inspired by the pairing and motivated to explore it further.


Before I proceed, let's discuss The Beef Checkoff for a minute. The 1985 Farm Bill established it to research and market beef and is funded by American cattle farmers and ranchers. Please follow them on twitter and pinterest in addition to #SundaySupper's own Beef Pinterest board plus give them a 'Like' on facebook. I also recommend checking out the recipe list on their website because it highlights the versatility of beef with categories such as breakfast dishes and repurposing leftovers. In the interest of full disclosure, this post is sponsored by The Beef Checkoff. All opinions are my own.

The Challenge

Replicate the flavor profile at home I tasted in a restaurant environment.

The Source

I adapted roasting method from thekitchn.com to the compound butters found on Kiss My Smoke.

Ingredients

2 heads garlic, loose layers of "paper" peeled
tablespoons olive oil, divided
Kosher salt and freshly ground black pepper
2 to 3 medium shallots, chopped
1 cup (2 sticks) unsalted butter, at room temperature
4 12-ounce top sirloin steaks
2 tablespoons Italian parsley, chopped (for garnish)

Method

1. Roast garlic: Preheat the oven to 400⁰ Fahrenheit and place an oven rack in the middle position. Cut each head crosswise so the tips of each clove are exposed. Drizzle each head with a teaspoon or two of olive oil, then wrap each head in aluminum foil. Place each foil pouch on a small sheet pan and roast in the oven until caramelized and soft. Start checking at 40 minutes and, if not completed, at 10 minute intervals until completed. Let it cool slightly, then squeeze out two-thirds of the cloves into a mixing bowl to cool completely. Reserve the remaining third separately.


2. Caramelize shallots and form the butter: While the garlic is in the oven, heat 1 tablespoon olive oil in a small skillet over medium heat. Once the oil starts to smoke, add the shallots and sauté until golden brown, stirring occasionally. Place the shallots along with any pan drippings into the bowl with the roasted garlic to cool. Once cooled, add the softened butter and mix using a hand or stand mixer with whisk attachments. Transfer the butter to a bowl, cover and refrigerate until ready to use.


3. Grill the steaks: Heat a grill or grill pan over medium-high heat. Once hot, grill the steaks to desired doneness, 3 to 4 minutes per side for medium-rare. Remove the steaks from the grill and allow to rest, tented with tin foil for 5 minutes. To plate, place a steak in the center of the plate, top with a tablespoon of the compound butter and garnish with parsley and reserved garlic cloves.


Successful?

While I tasted the same flavor profile, it wasn't as good as the restaurant dish. By the way, I did take a picture of the filet, which follows:


Before you go, check out the other beefy dishes in this week's event.

Sunday Supper MovementJoin the #SundaySupper conversation on twitter on Sunday! We tweet throughout the day and share recipes from all over the world. Our weekly chat starts at 7:00 pm ET. Follow the #SundaySupper hashtag and remember to include it in your tweets to join in the chat. To get more great Sunday Supper Recipes, visit our website or check out our Pinterest board.

Would you like to join the Sunday Supper Movement? It’s easy. You can sign up by clicking here: Sunday Supper Movement.

Sunday, June 29, 2014

Grilled London Broil with Caramelized Red Onions for a Picnic #SundaySupper

Grilled London Broil with Caramelized Red Onions for a Picnic #SundaySupper


Call this the conclusion to the London Broil dish I published this past Wednesday. In the post, I profiled a dish that appears in one of Rachael Ray's cookbooks promising to return with an updated (hopefully superior) dish. In addition, this dish is for a #SundaySupper event so I need to explain how this ties into this week's theme.

From a technical standpoint, I like this dish better. First, it's seasoned simply with salt and pepper instead of marinated. Secondly, it's grilled to achieve a better sear instead of broiled. Believe it or not, I actually simplified the accompaniment to the London Broil but it tasted better. From a #SundaySupper standpoint, this week's theme is picnic foods to celebrate the American Independence Day holiday hosted by Jane of Jane's Adventures in Dinner (Thanks, Jane!) later in the week. I like it for summer barbecues because London Broil is generally a cheaper cut of beef that doesn't sacrifice flavor and can feed a lot of people. Furthermore, it can be grilled quickly so there's more time to spend with guests at your barbecue.

I must confess. The onion component of this dish was one of my first success as a food blogger several years ago with my first website. Mrs. Stuntman requests it often. In this case, the balsamic vinegar brings out the sweetness of the red onions that complements the beef well.

The Challenge

Prepare a dish inspired by a Rachael Ray recipe

The Source

I reused the flank steak method from a dish I published last year and adapted the caramelized red onions from epicurious.

Ingredients

2 tablespoons extra-virgin olive oil
2 tablespoons unsalted butter
3 to 4 large red onions, halved, then sliced thin
2 teaspoons balsamic vinegar
Kosher salt
Freshly ground black pepper
1 2-pound London Broil
1 tablespoon Italian parsley, chopped (for garnish)

Method

1. Finish the mise en place. If using an outside charcoal grill, prepare and preheat it. Bring the London Broil to room temperature by setting it out on the counter for no more than 30 minutes. Season the Broil with kosher salt and freshly ground black pepper.

2. Caramelize the onions. Melt the butter in the olive oil in a large non-stick skillet over medium heat. Add the onions and cook until golden brown, stirring frequently, approximately 30 minutes. Add in the balsamic vinegar and season with kosher salt and freshly ground black pepper, to taste.


3. Prepare the London Broil. Place the London Broil under direct heat if using a charcoal grill, or under medium high heat with a gas grill or grill pan, 6 minutes per side for medium rare but test for doneness. Set aside and let it rest to allow for carryover cooking for 5 to 10 minutes while you finish the onions. Slice the London Broil thinly across the grain for tender pieces. To plate, serve family style garnished with parsley.


Successful?

I plated differently for this post but it was still delicious and better than Rachael Ray's recipe.

Before you go, please check out the other picnic dishes prepared for this #SundaySupper event:

Beverages
Appetizers
Mains
Sides
Salads
Sandwiches and Wraps
Sweets
Join the #SundaySupper conversation on twitter on Sunday! We tweet throughout the day and share recipes from all over the world. Our weekly chat starts at 7:00 pm ET. Follow the #SundaySupper hashtag and remember to include it in your tweets to join in the chat. Check out our #SundaySupper Pinterest board for more fabulous recipes and food photos.

Would you like to join the Sunday Supper Movement? It’s easy! You can sign up by clicking here: Sunday Supper Movement.


Monday, March 24, 2014

Light Stunt: Penne alla Vodka

Penne alla Vodka


I would categorize Mrs. Stuntman and I as infrequent drinkers. We might have a glass of wine with dinner if we're having friends over for dinner or on a special occasion such as anniversaries or birthdays but that's about it. I might drink a beer twice per year, maybe? I don't have any medical or moral objections to it. I just don't crave it very often. I do buy a lot of wine but it's the cheap stuff I use for cooking.

It is for this reason that I was curious when found an open, half-empty bottle of vodka recently when I was cleaning the kitchen. I vaguely remember using it in a dish but I couldn't tell you when or from what dish. Not wanting to waste food, I went looking for dishes that highlighted the ingredient and zeroed in on a pasta favorite.

The Source

This dish was prepared by Chef Mario Batali on The Chew.

Ingredients

Kosher salt
1 pound dried penne
6 ounces bacon, cut into batons
2 cloves garlic, minced
1 6-ounce can tomato paste
1/4 cup vodka
1/2 cup heavy cream
1 pinch nutmeg
Freshly grated Parmesan and chopped Italian parsley (for garnish)

Method

1. Boil the pasta: Bring a large pot of well-salted water to a boil over high heat. Add the penne and continue to boil for two minutes less than the box instructs. Reserve 1 cup of pasta water, then drain and set aside if the sauce isn't finished yet.

2. Prepare the sauce: While the pasta boils, render the bacon in a large sauté pan over medium heat until slightly crisp, approximately 7 to 10 minutes.


Add in the garlic and tomato paste and cook until the tomato paste turns a darker color and the garlic is fragrant.

Add the vodka to deglaze and stir to blend the flavors. Then add the heavy cream and nutmeg and simmer for a minute or two. Add in the cooked penne and toss to coat, using the reserved pasta water to adjust the sauce and season with salt, if necessary. Serve in warmed bowls garnished with grated Parm and parsley.

Saturday, February 8, 2014

Presenting: Warm Fennel and Bitter Greens Salad

Warm Fennel and Bitter Greens Salad


This past Sunday, a certain football game was played, Punxsutawney Phil determined the fate of winter, and the second anniversary of the first dish I published on this blog. I wanted to mark the occasion with a little more flair, but time got the best of me.

As I stated earlier, one of my goals for 2014 is to eat more salads so I was looking online for ones that use ingredients that are in season now and came across this one on Food & Wine magazine's website. I thought it looked good enough to present here.

Check back tomorrow for my #SundaySupper contribution.

Tuesday, January 21, 2014

Arroz con Pollo

Arroz con Pollo


The fact that bone-in skin-on chicken thighs appeal to me is no secret. So one day a couple of weeks ago, I had some defrosting in the refrigerator and was looking for a different way to prepare them.

The Source

I adapted this dish from the recipe I found on Food & Wine.

Ingredients

1 tablespoon olive oil
4 chicken thighs
Kosher salt
Freshly ground black pepper
2 ounces smoked ham, sliced into 1/4-inch dice
1 yellow onion, chopped
2 cloves garlic, minced
1 green bell pepper, chopped
1 red bell pepper, chopped
1 14-ounce can whole tomatoes, drained and chopped
1 tablespoon tomato paste
2 cups chicken stock
1 cup long-grain white rice
1 teaspoon fresh chives, minced

Method

1. Sear the chicken: In a large skillet, heat the oil until smoking. Season the chicken with salt and pepper then place in the hot oil over medium-high, in batches if necessary, until browned on both sides, adjusting heat if necessary to prevent burning, approximately 8 minutes per batch. Once browned, remove from pan and set aside, then discard all but 2 tablespoons of the rendered fat.


2. Season the dish: Reduce heat to medium-low. Sweat the ham, onion, and garlic to the pan until the onion starts to soften, approximately 2 minutes. Add both bell peppers and sweat, stirring occasionally until they soften, approximately an additional 3 minutes.


3: Cook the rice, blend the flavors and finish the dish: To the mirepoix, add the tomatoes, tomato paste and stock, then season with salt and pepper. Stir in the rice, add the chicken back to the pan (skin side up), and cover. Simmer it until the chicken and rice are cooked through, approximately 20 to 25 minutes. Garnish with chives and serve.

Successful?

As I looked around, I noticed it is common for this dish to be photographed while still in the pan, but I wanted to take a shot of an individual plate. In retrospect, I regret the decision. While not my most aesthetically pleasing dish, the flavors definitely were and I'll be preparing this dish again.

In other news, I must ask for your pardon for my short absence. I was pretty busy, partially because Mrs. Stuntman celebrated a birthday last week. She wanted to go to Chef Michael Mina's Arcadia in San Jose. I don't do restaurant reviews but I did want to share the dishes we ordered.

Appetizer: Duck Spring Rolls, Ginger Dipping Sauce, Butter Lettuce, Mint


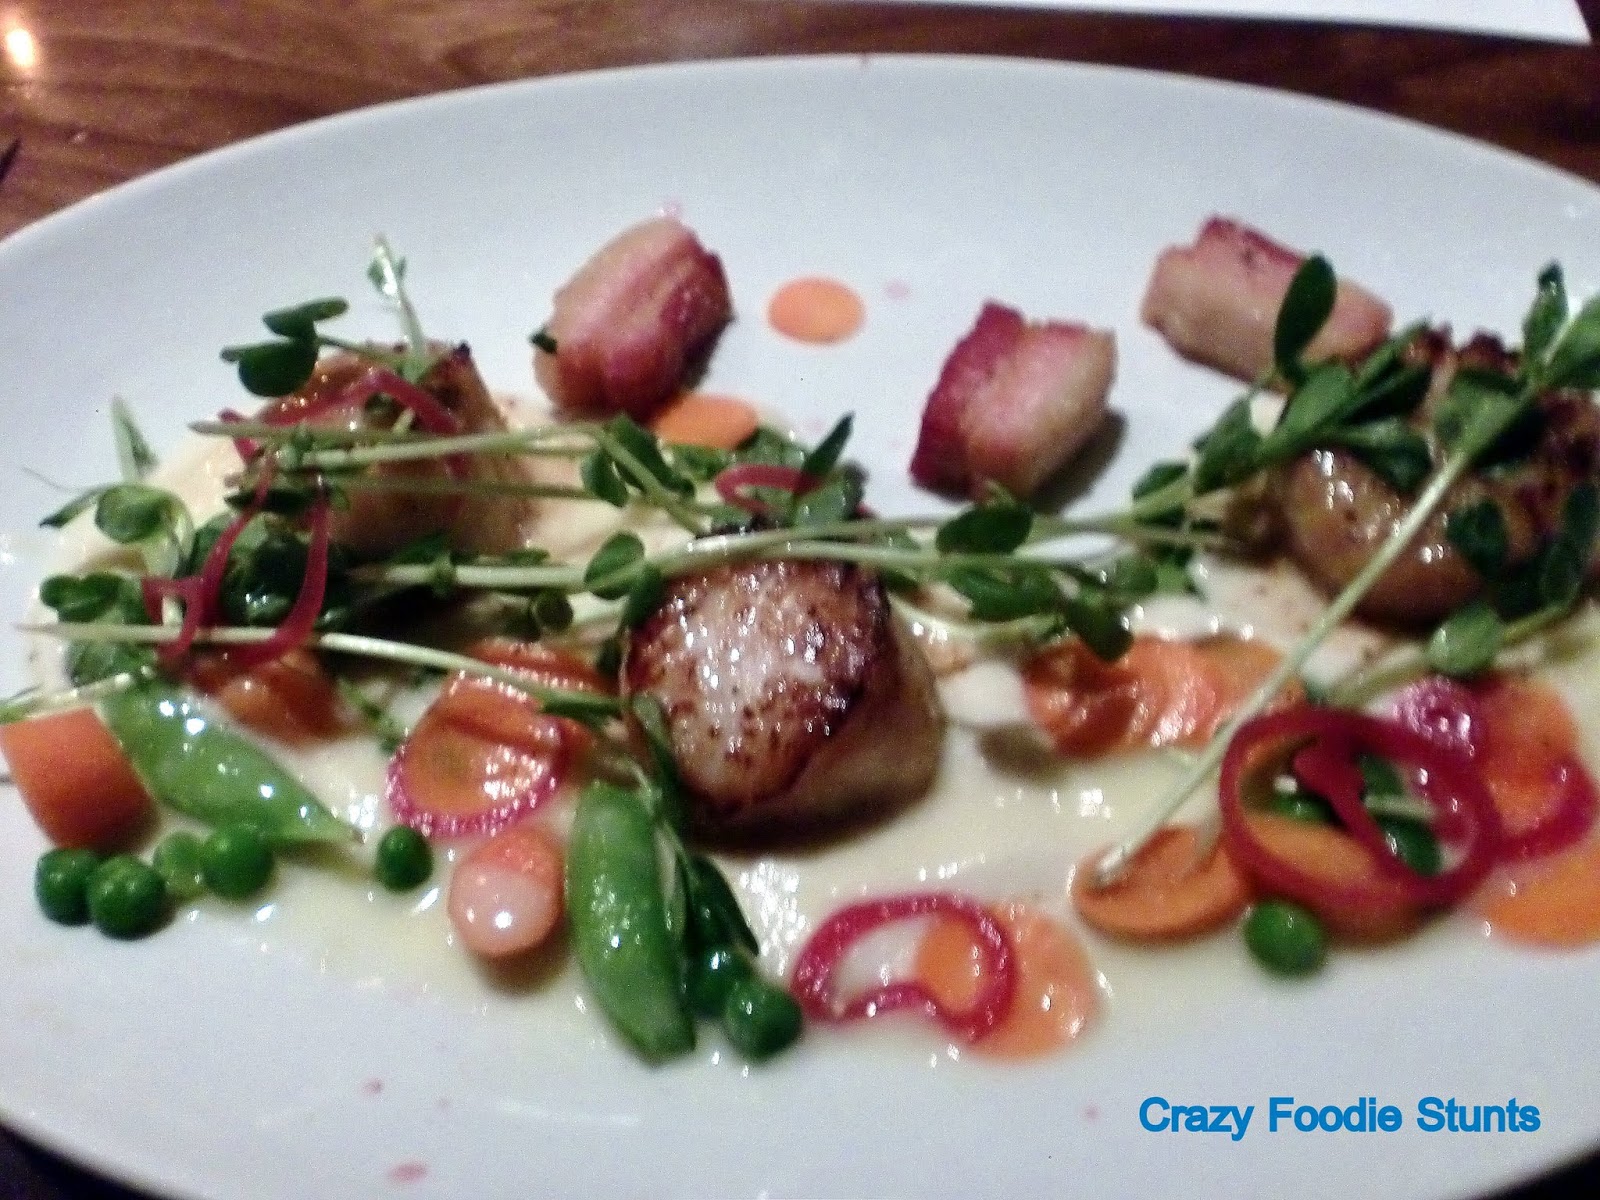
My Entreé: Buzzards Bay Scallops, Pork Belly, Meyer Lemon, Onion Soubise


Mrs. Stuntman's Entreé: Phyllo-Dusted Sole, Dungeness Crab Brandade, Hericot Verts, Dijon